Environments and Technologies Used
Windows 10 (Local)
Tenable Nessus
Windows 10 Virtual Machine Running in Virtual Box
In this tutorial, I will demonstrate a basic scan using Tenable Nessus on a Windows 10 virtual machine using Oracle Virtual Box. This tutorial assumes you already have Nesuss installed and a Windows 10 instance running on a local virtual machine or in the cloud.
Main Steps of Deployment and Scan
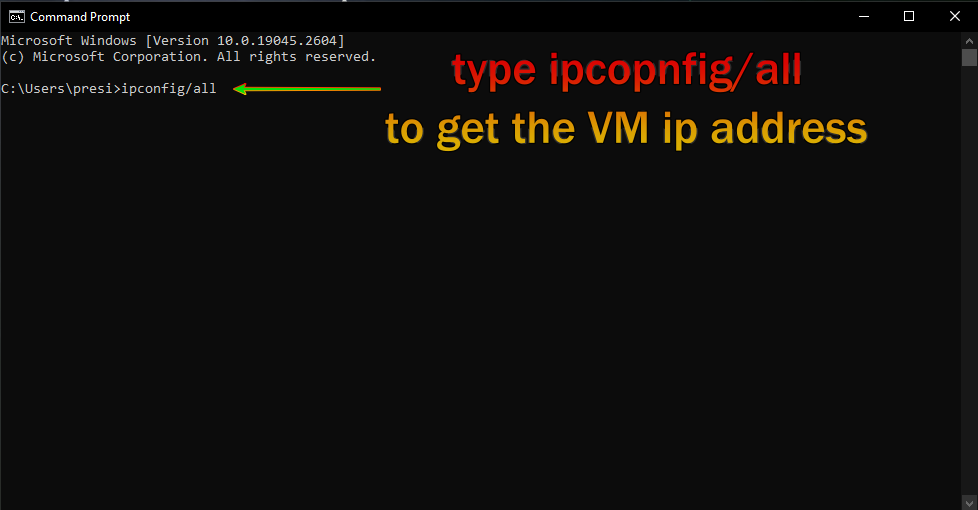
Step 1. Get the ip address of the Virtual Machine you have running by opening a command window and typing the ipconfig/all command
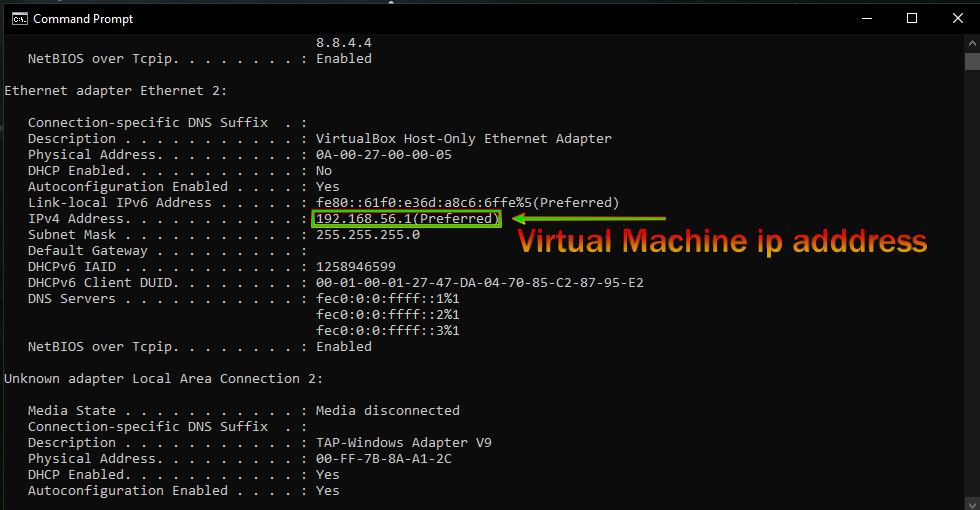
1b. Note the ip address of the virtual machine
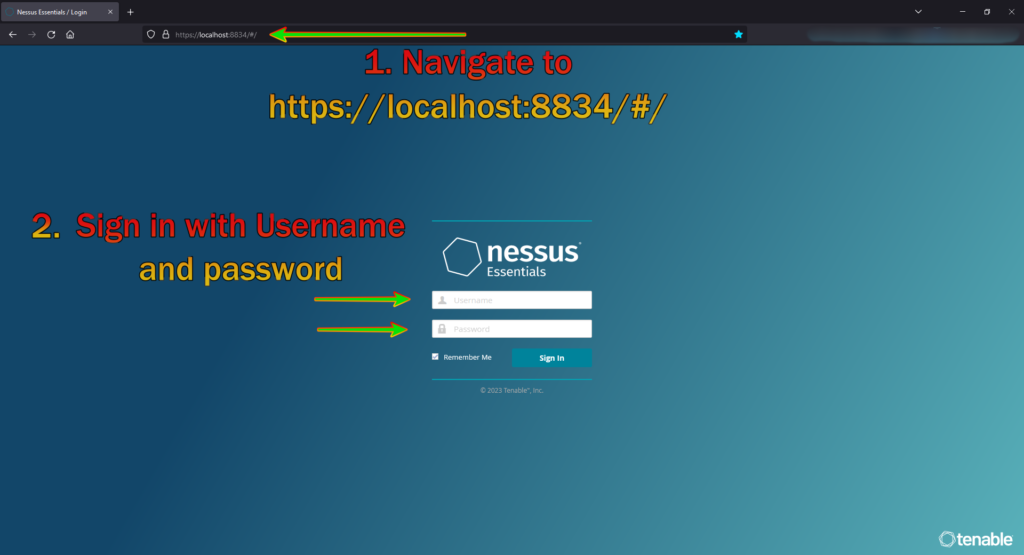
Step 2. Navigate to the url of your Nessus install and sign in. (Most of the time it’s https://localhost:8834/#/)
Step 3. Once you sign in click new scan at the top right corner

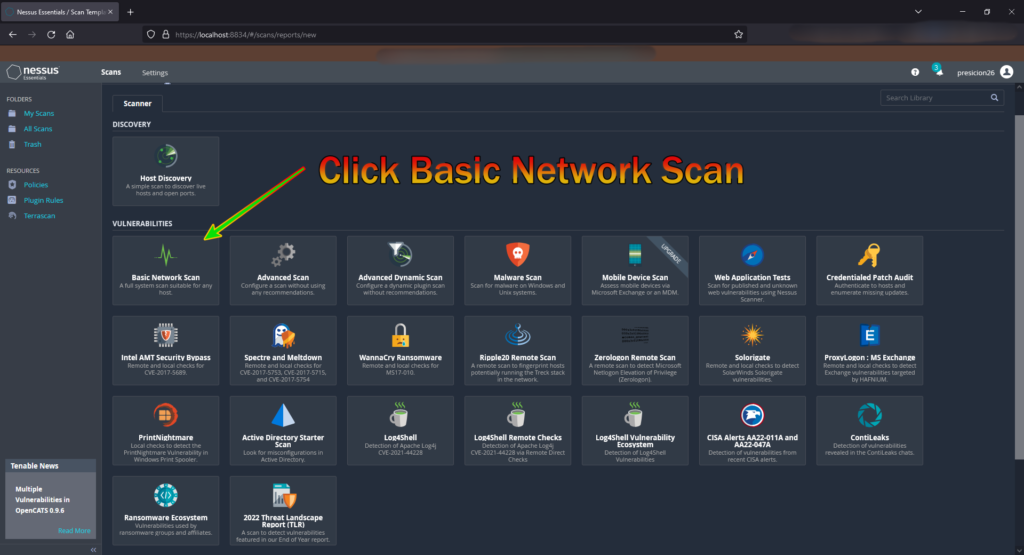
Step 4. Click Basic Network Scan from the scanner menu
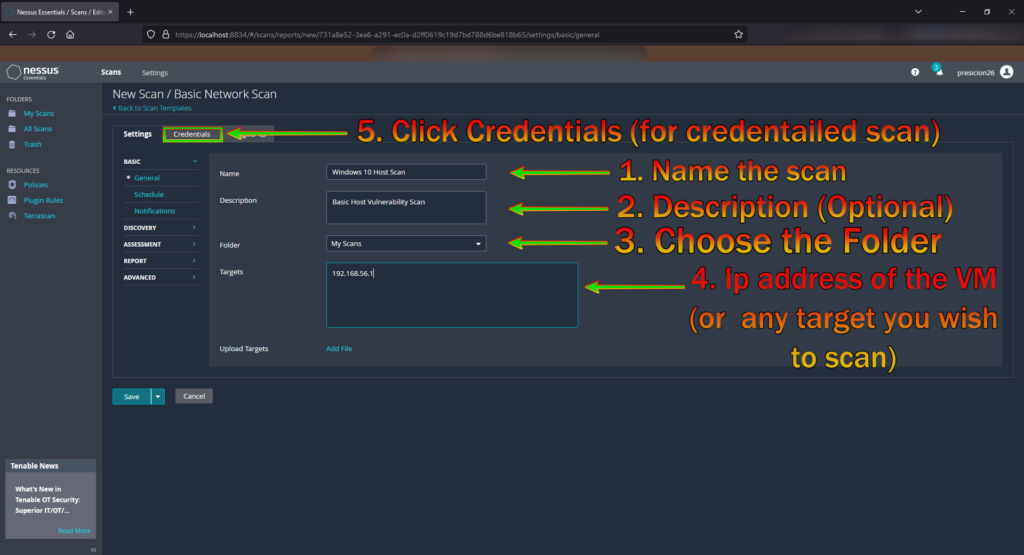
Step 5. Fill in a name, choose a folder, a description (optional) and the ip address of any target you want scanned, then click Credentials (if you wish for a deeper scan into a target)
Step 6. Click Windows to open up the credential settings
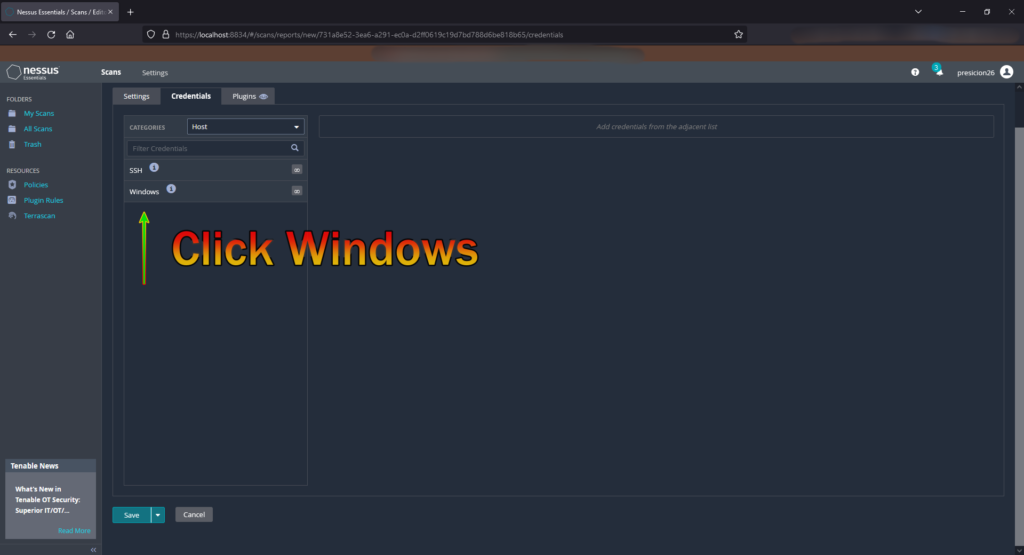
6b. Enter in the credentials of the machine you wish to scan deeper into and click save at the bottom

Step 7. Click the play button all the way to the right to start the scan (as pictured below)

7b. As the scan proceeds, you will see a spinning circle (as illustrated below). Click the scan title to see any information being populated. A full scan usually takes at least a few minutes or more. When the circle stops spinning it’s finished.

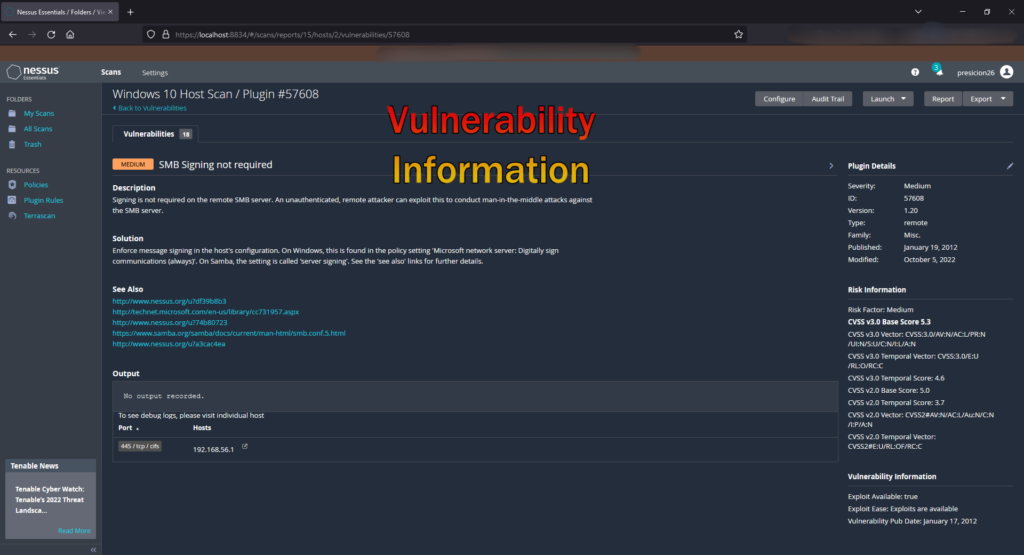
7c. Click the vulnerability info to see any information being reported
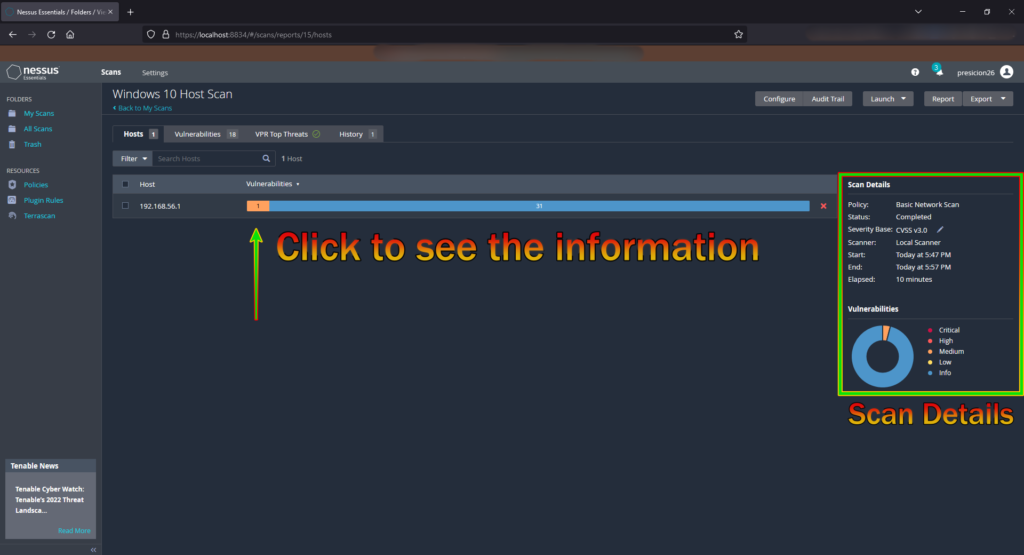
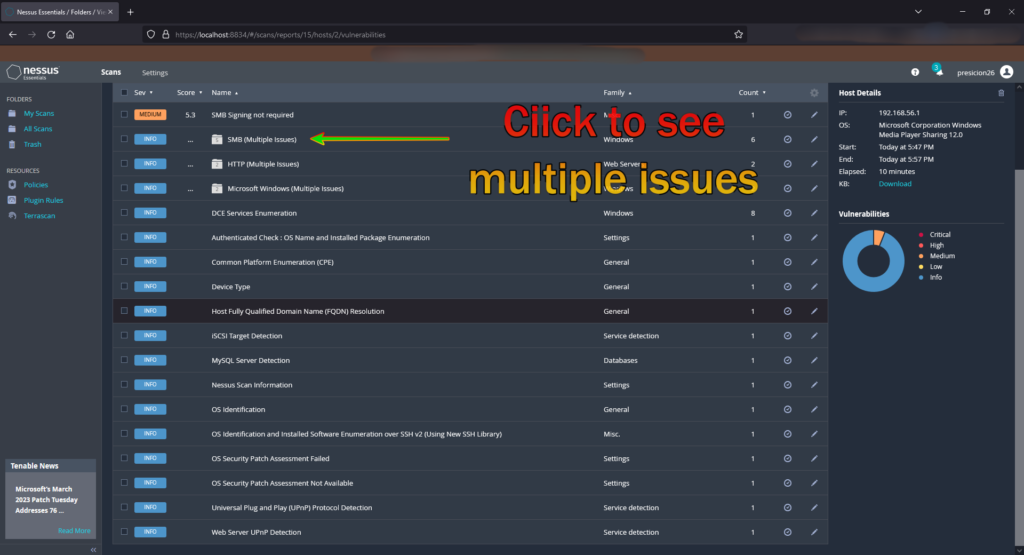
Step 8. Once you see the Vulnerability information, if there are multiples in a folder you can click the folder to see further information
8b. Vulnerability information is displayed when clicked
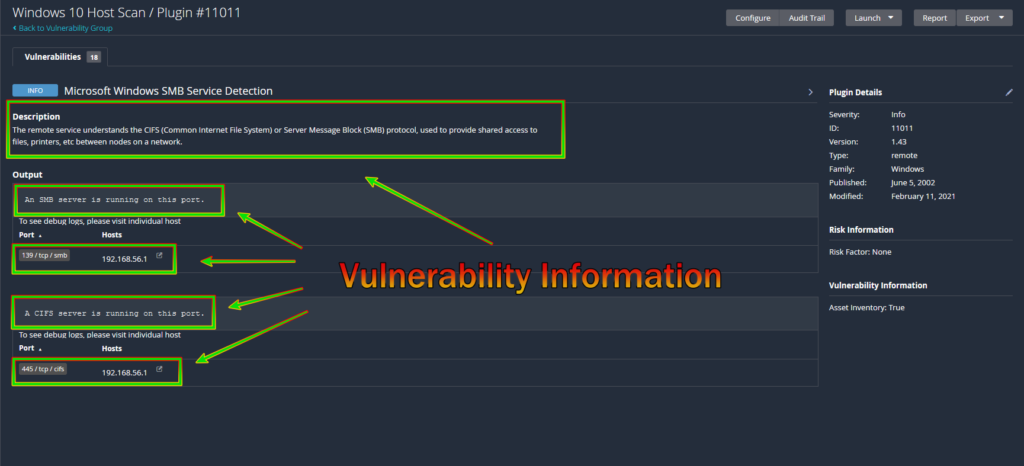
8c.
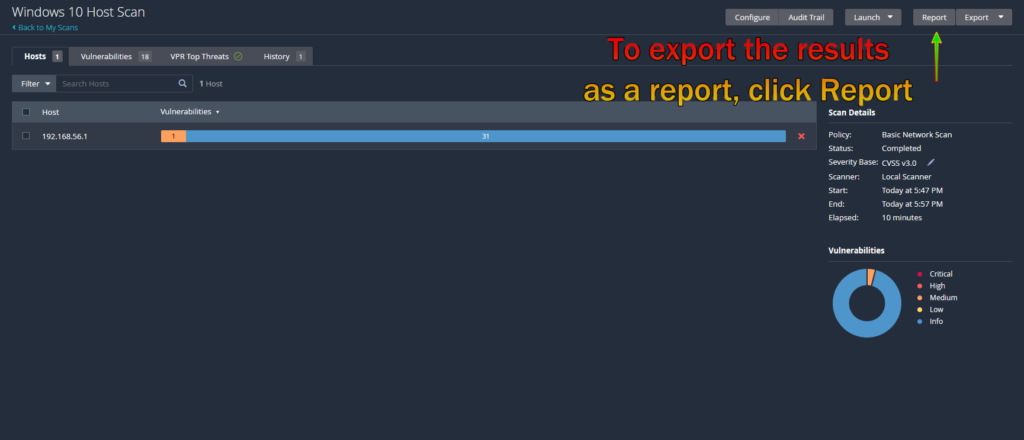
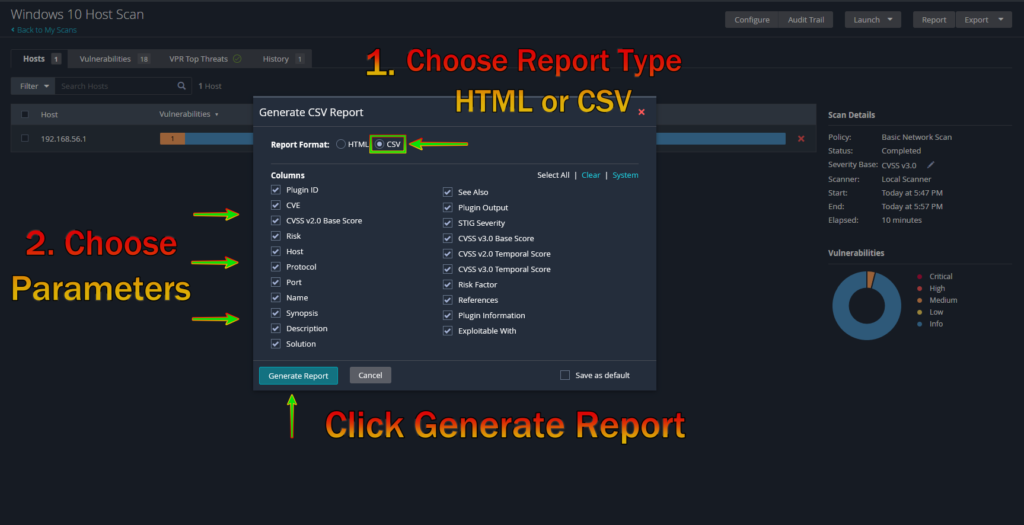
Step 9. (Optional) To save and export a report, click Back to Vulnerabilities at the top left and click the report tab (top right)
9b. Choose your report type (CSV or HTML). For a CSV report, choose the option for CSV and the settings, then click generate report at the bottom as displayed below
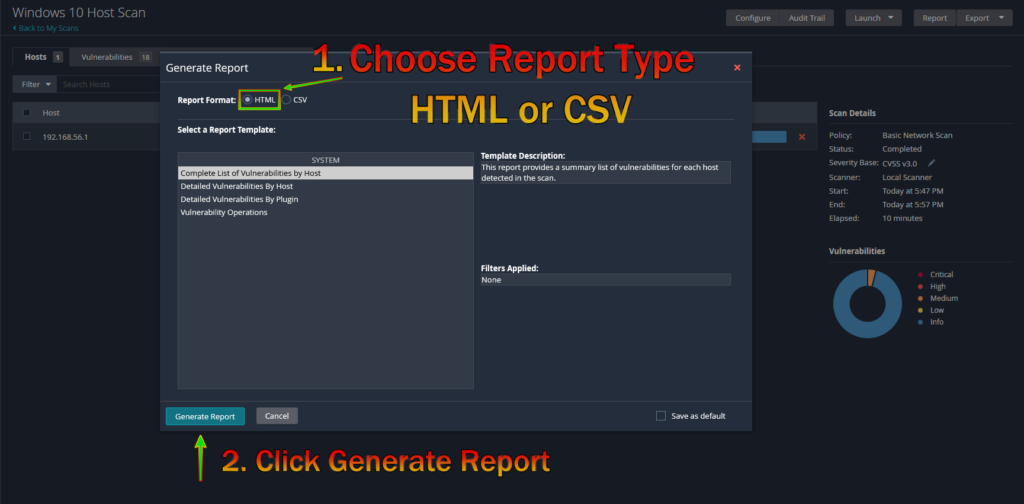
9c. For an HTML Report, choose the option and settings, then click generate report at the bottom as displayed below
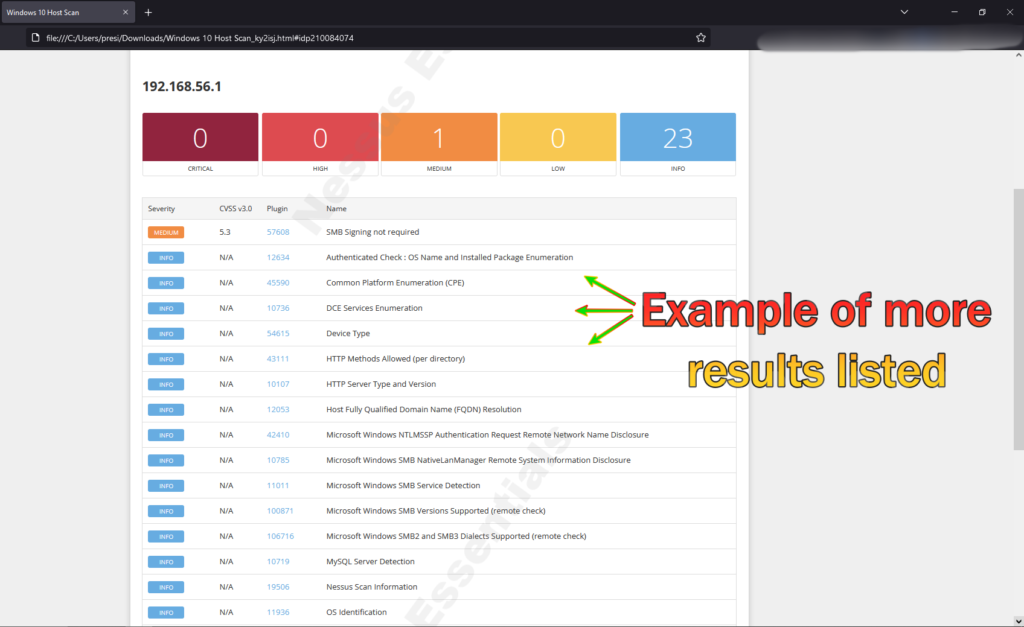
Step 10. Report types displayed below (HTML Report)

10b. After clicking expand all you can see more information dispalyed
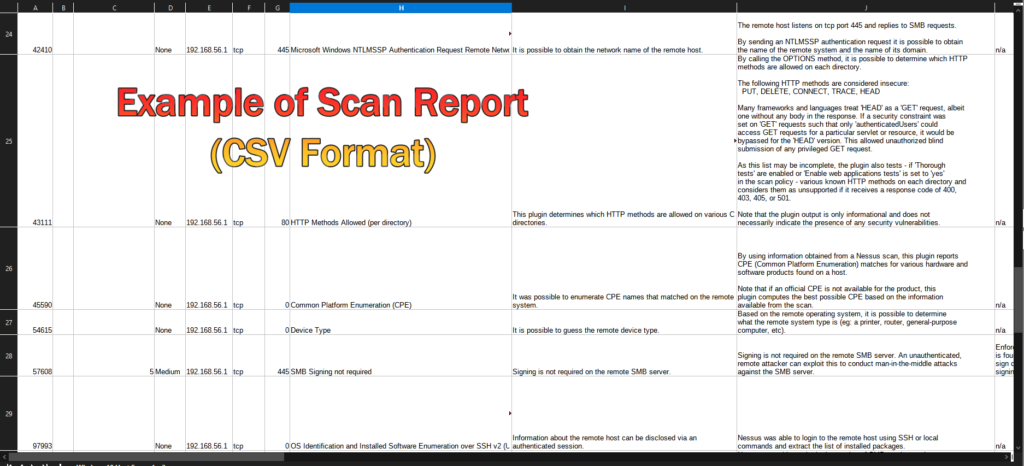
10c. CSV Report (Spreadsheet)