In this tutorial I will demonstrate how to add a hard drive to a storage pool in order to expand the storage space available in a Synology NAS, specifically the ds1821+. I only have one storage pool so I will be demonstrating the pool expansion using my storage pool. This tutorial assumes you have empty drive bays on your NAS. The raid type I am using is SHR (Synology Hybrid Raid.), as opposed to RAID 0, RAID 5, etc.
Environment and Technologies Used
Synology NAS
DSM 7.1 (Disc Station Manager (Operating System)
DSM Storage Manager
Main Steps
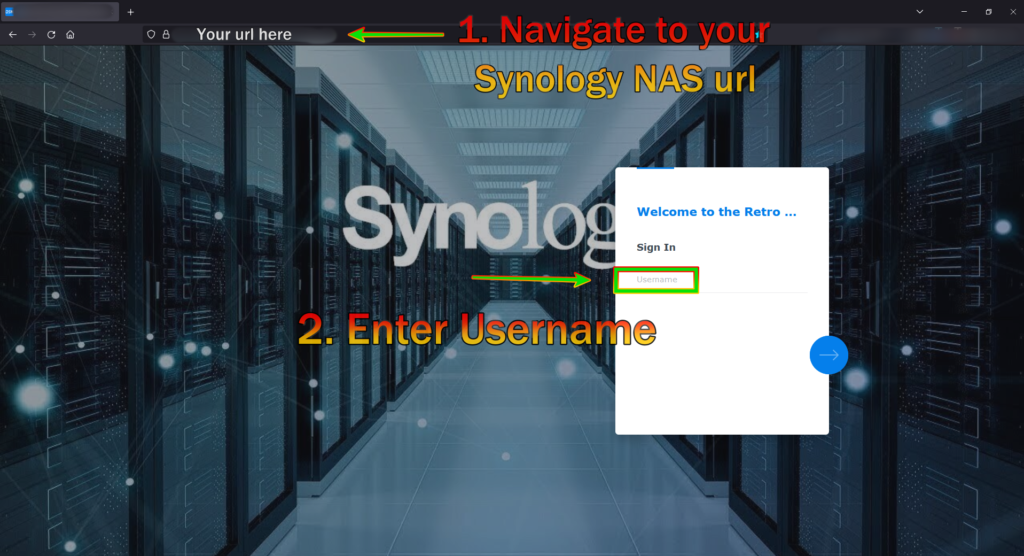
Step 1. Navigate to your synology NAS url, using your browser of choice and enter your username. For purposes of this tutorial I use Firefox.
Step 2. Enter your password and log in

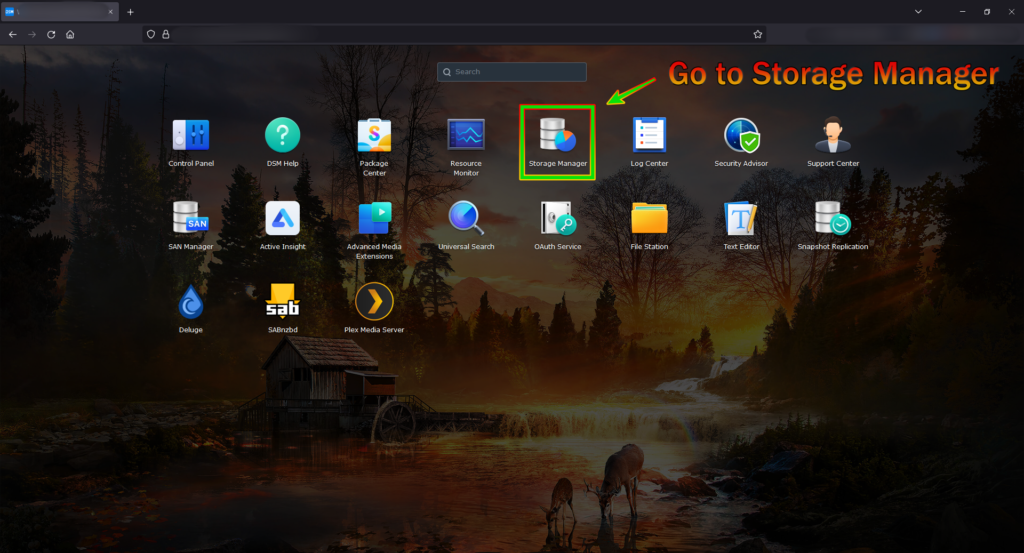
Step 3. On the main page, click the icon at the top left of the screen (as displayed below)

Step 4. Next, click on storage manager
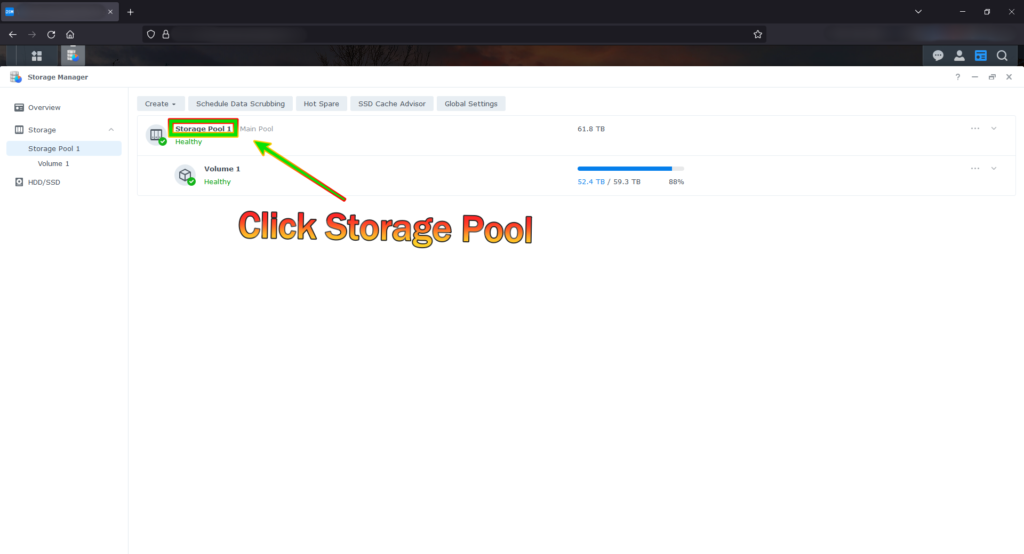
Step 5. Find the storage pool you wish to expand (if you have multiple) and click it (in this case storage pool 1)
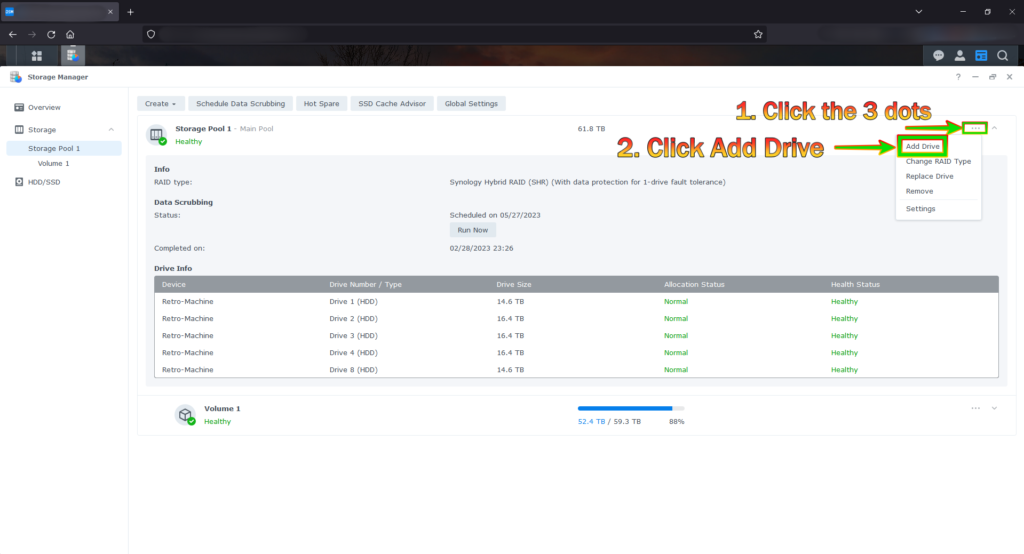
Step 6. Find the 3 dots on the top right of the storage pool information and select add drive
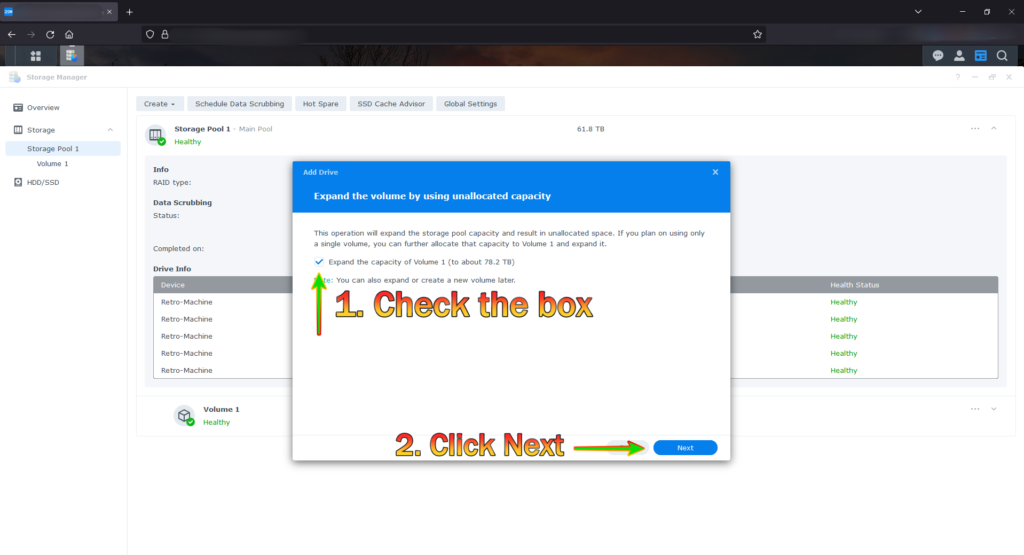
Step 7. Select the drive you wish to add to the storage pool and click next

7b. Next, click the check box for expand the capacity of volume 1 (or whatever volume you’re expanding) and click next
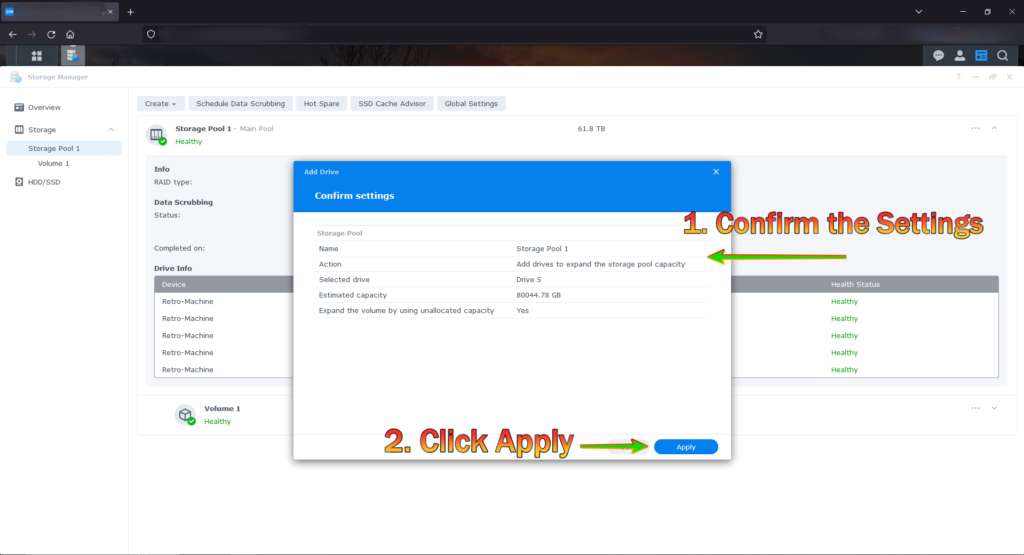
Step 8. Confirm the settings and click apply
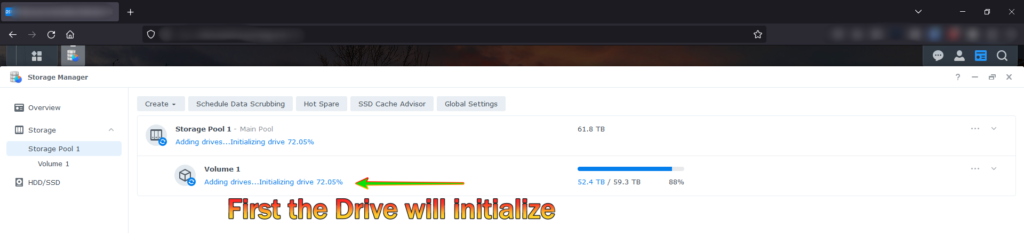
Observations
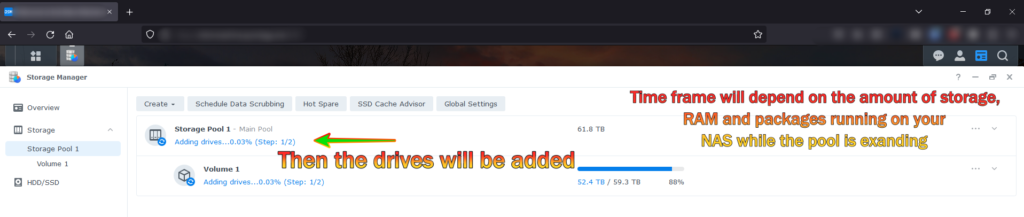
The drive will initialize
2. Then the drive will begin to be added