Technologies and Environments Used
-PHP
-osTicket
-Azure VM (Windows 10)
Main Steps
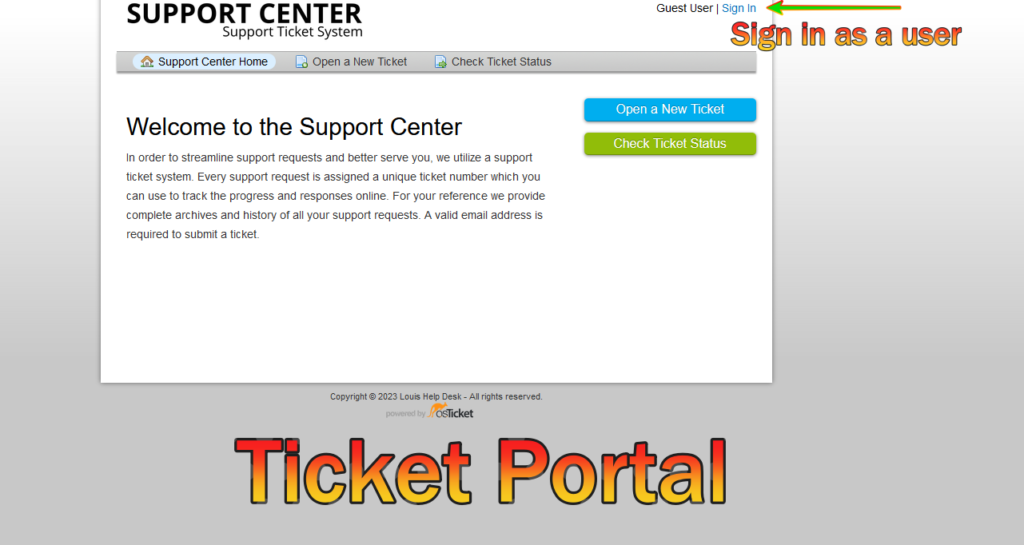
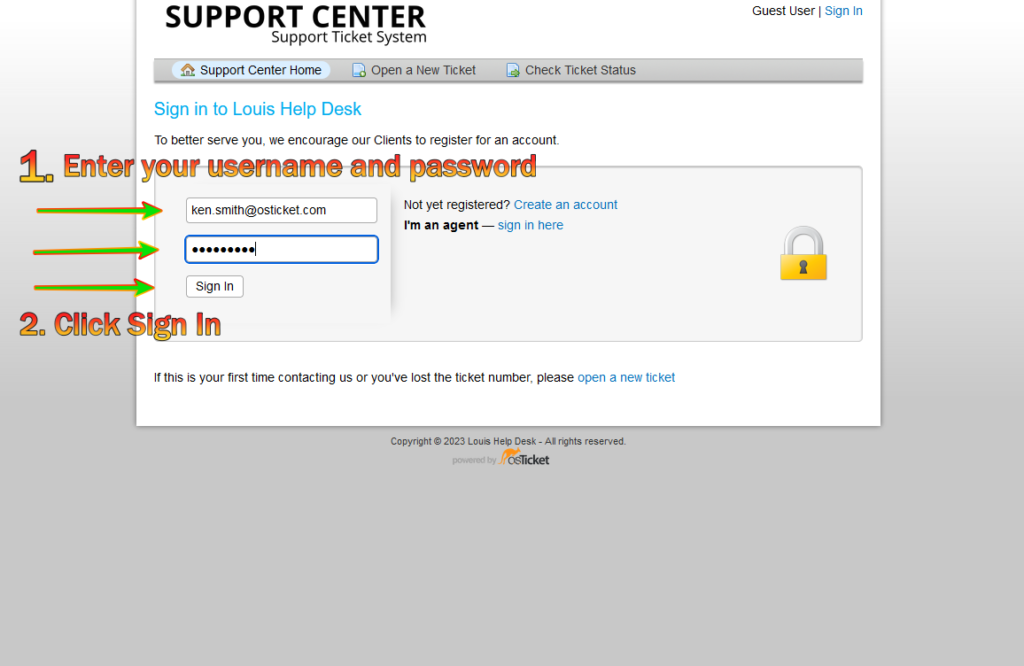
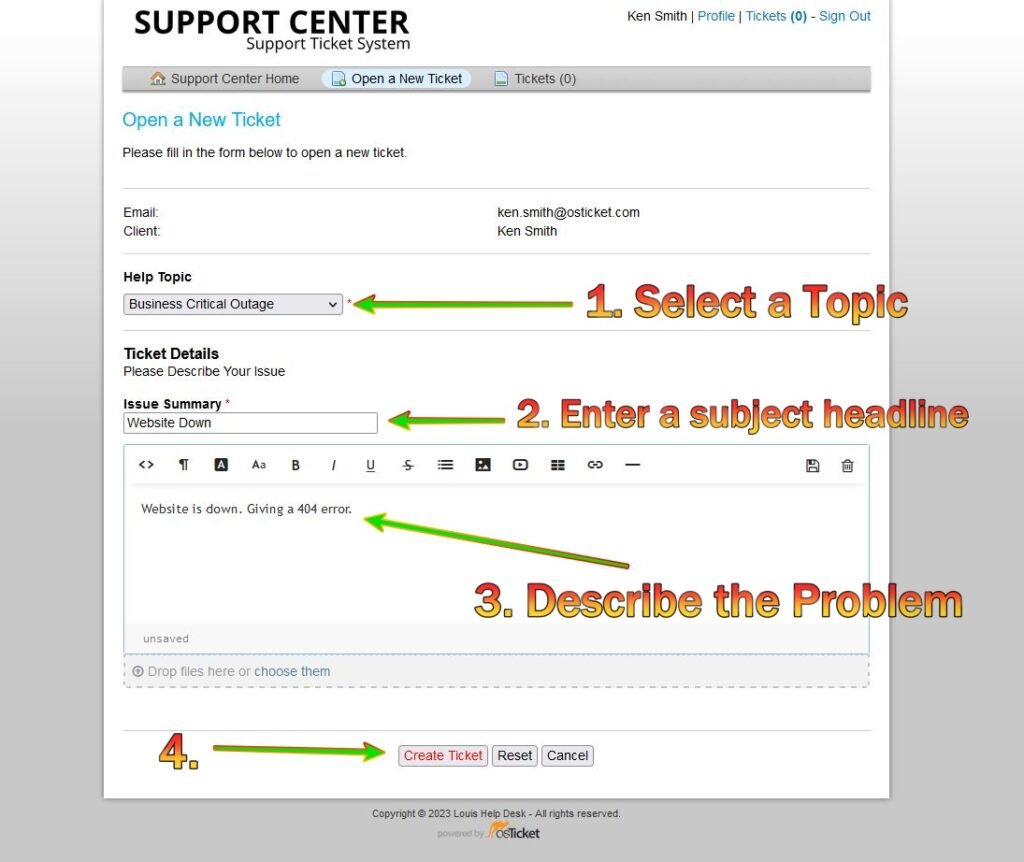
1. Go the portal to sign in and open a new ticket as a customer. For testing purposes the url is http://localhost/osTicket
1b.
2. Enter the ticket details, create the ticket and log out
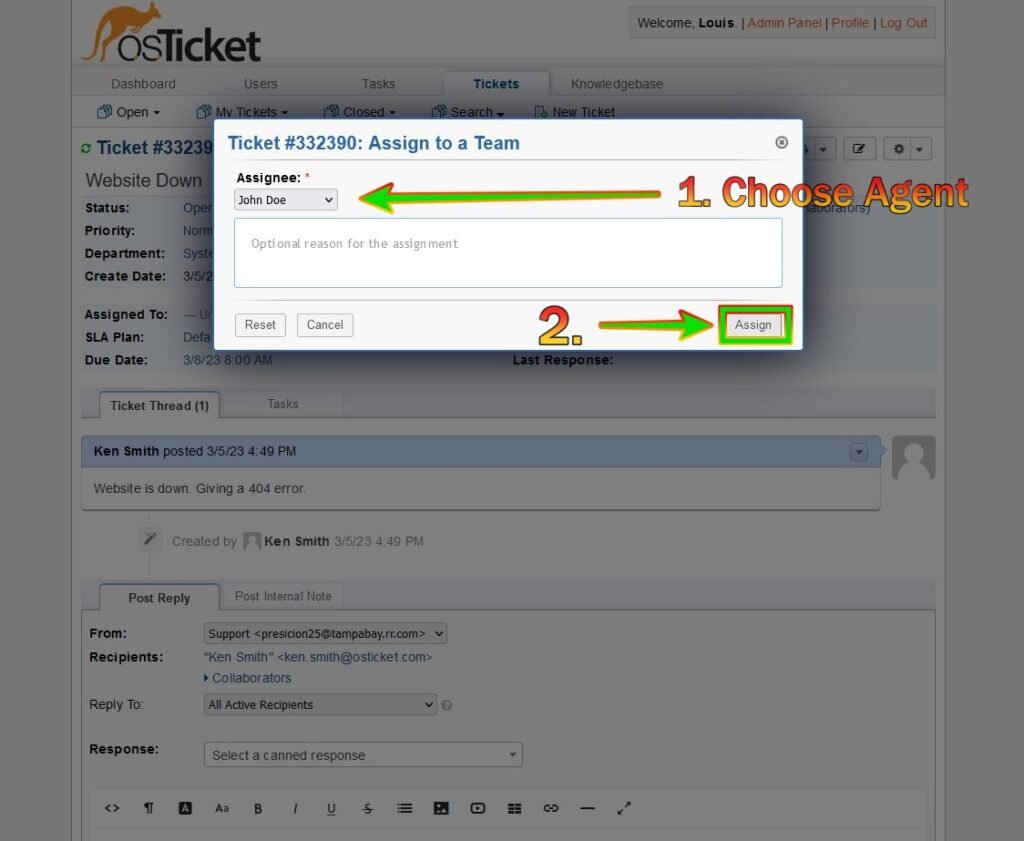
3. Sign back in as the main admin, click “Assigned To” and assign the ticket to an agent (SLA, Agent, etc)
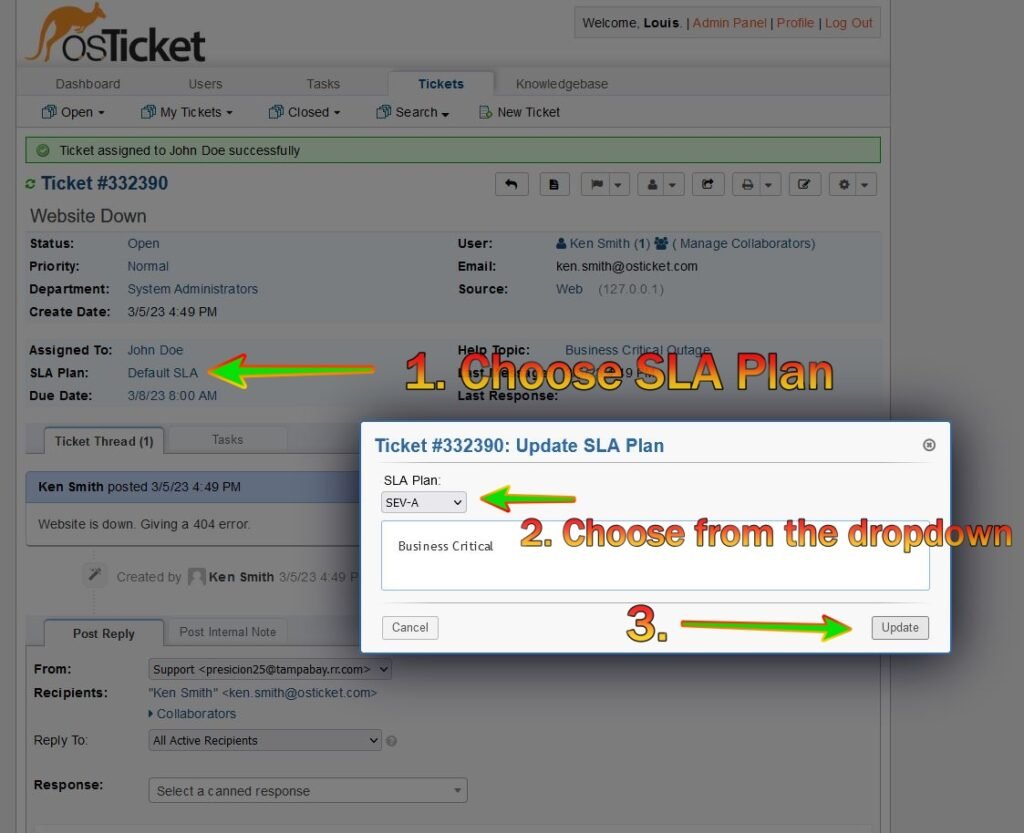
3b. Choose an SLA Plan
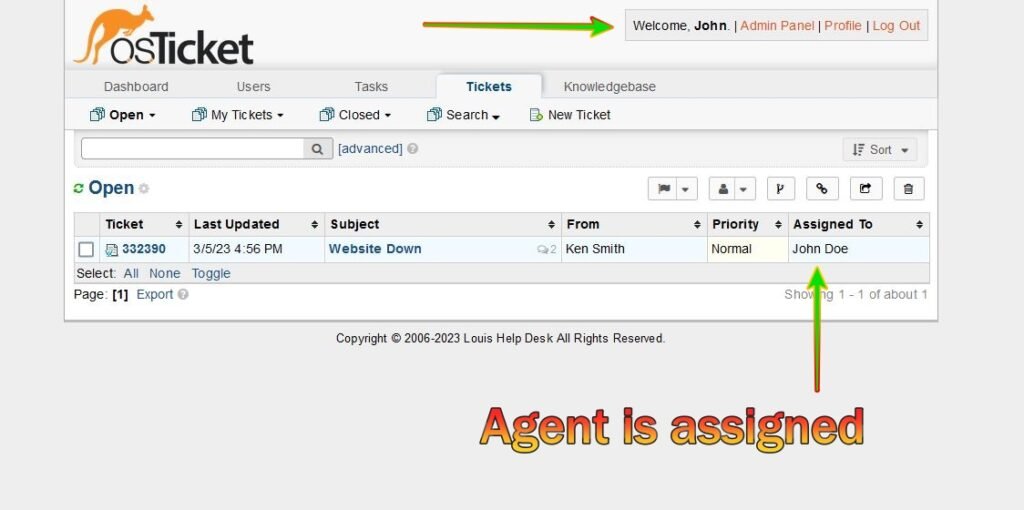
3c. Agent has been assigned
4. Sign in as an agent to work the ticket

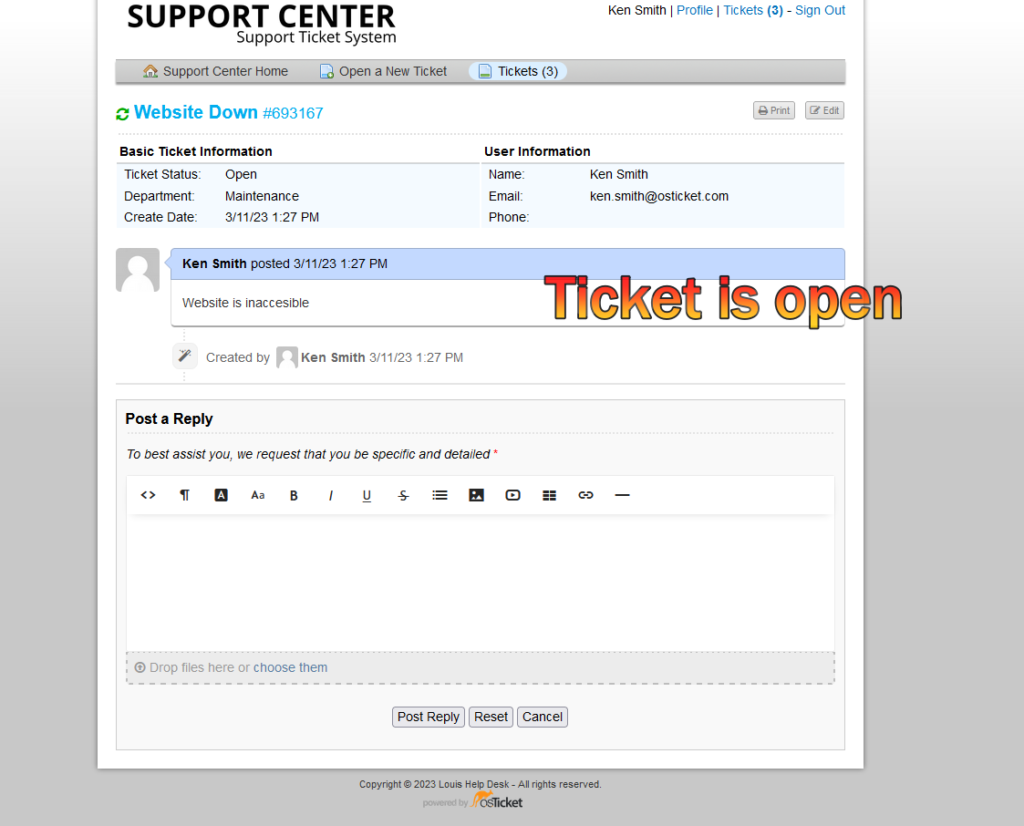
4b. When you see the ticket, go into the subject to view the ticket

4c. When you click into the ticket subject you should see the screen below
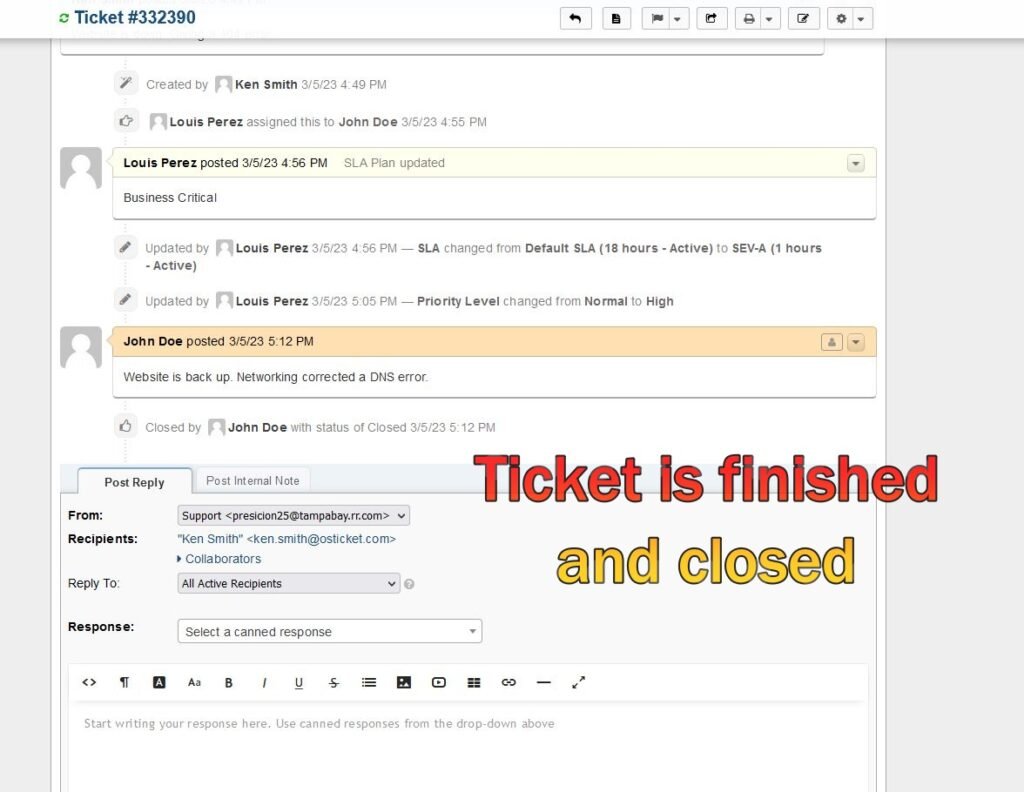
4d. Once the ticket is resolved, explain the fix, choose the status and reply to the customer.

4d. Ticket is closed