In the second tutorial of the osTicket series, I go through the steps to configure and setup osTicket after installation from the previous tutorial
Technologies and Environments Used
PHP
osTicket (Help Desk Ticketing System)
Main Steps
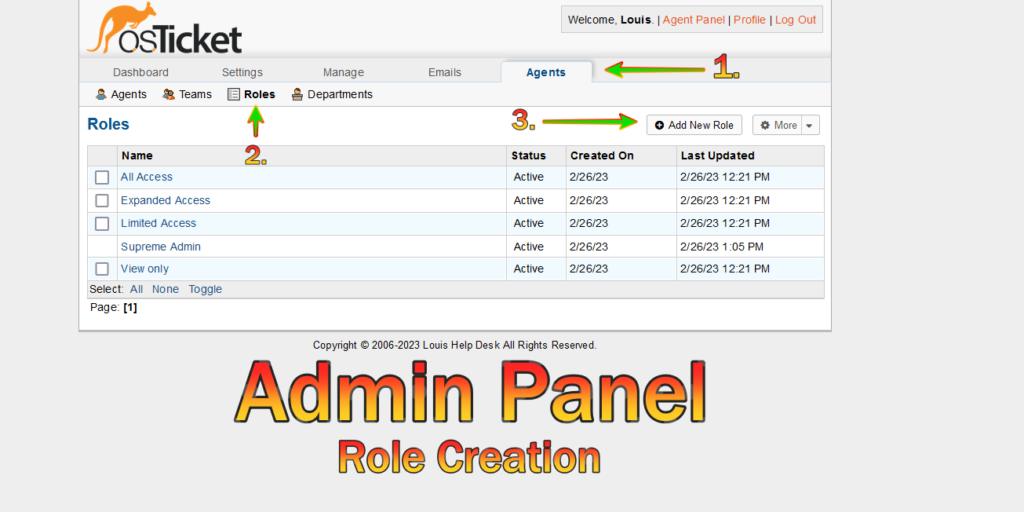
Step 1. Configure roles in the admin panel. Go to:
Admin Panel -> Agents -> Roles
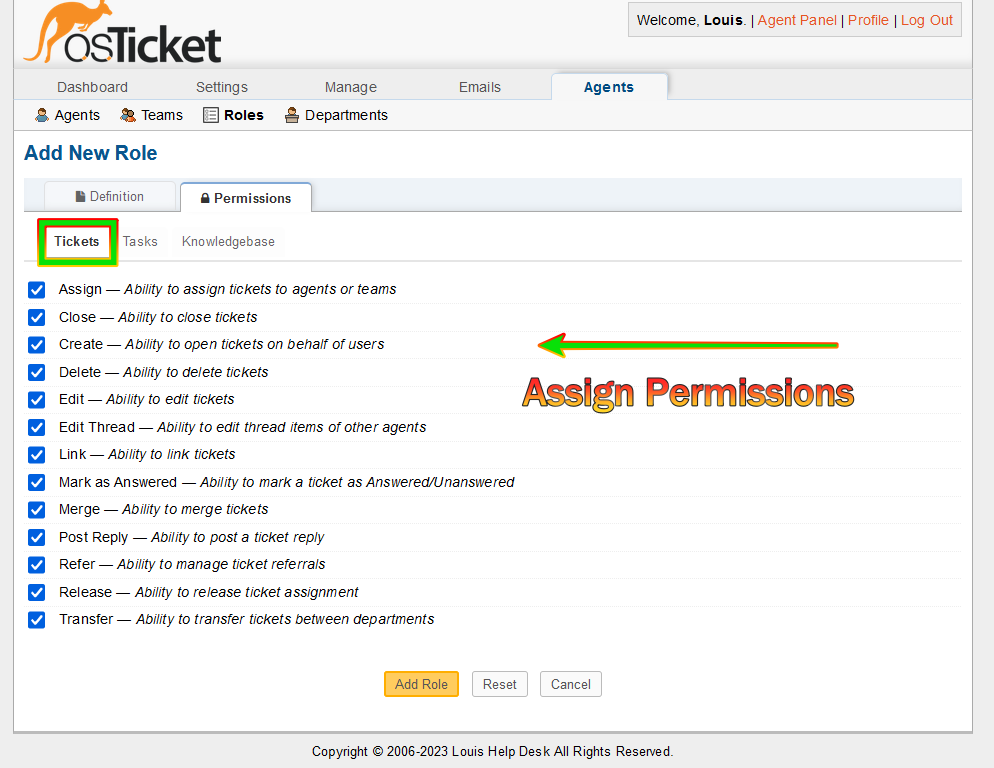
For testing purposes create the role: Supreme Admin and assign permissions
1b.
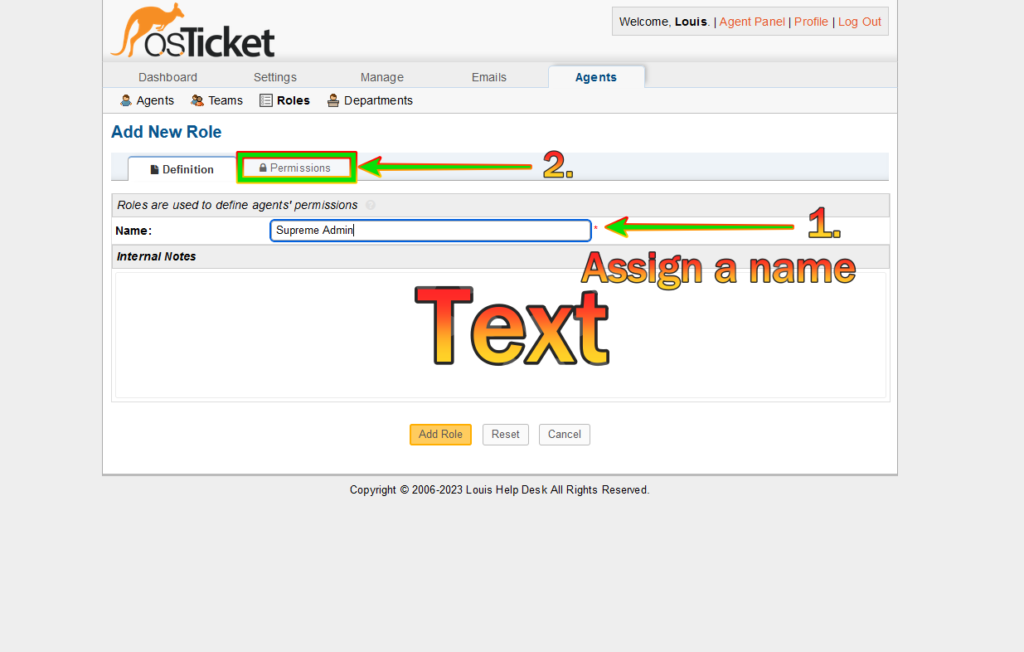
1c. Assign Ticket Permissions
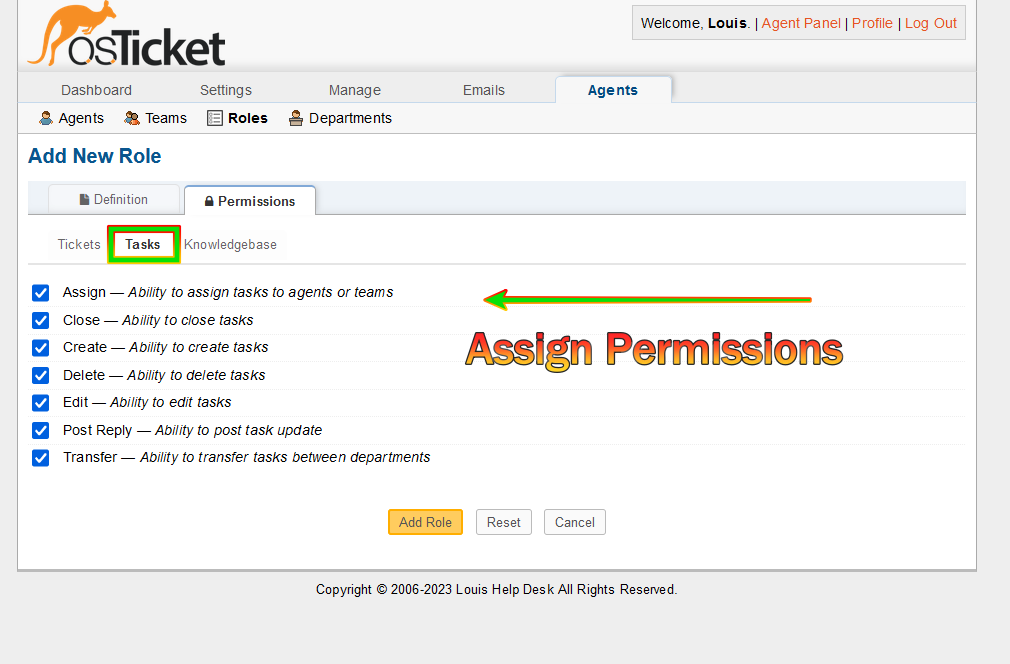
1d. Assign Task Permissions
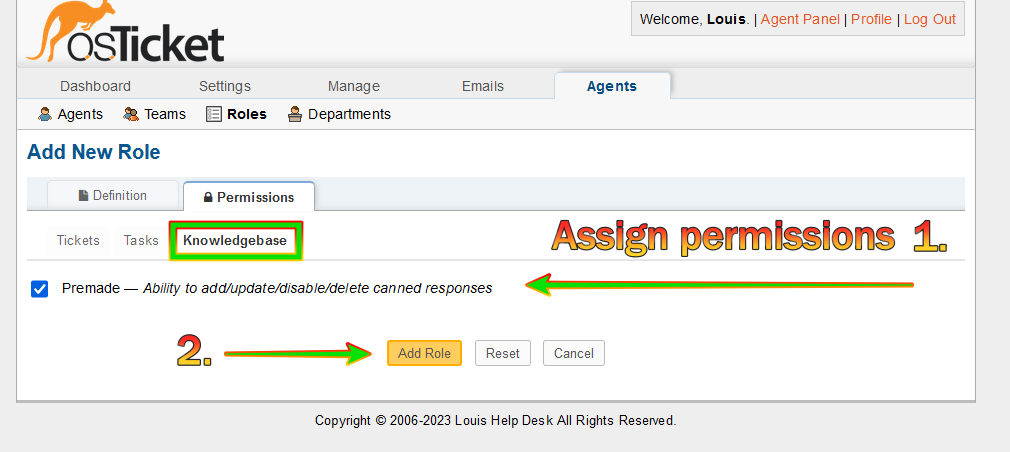
1e. Assign Knowledgebase Permissions
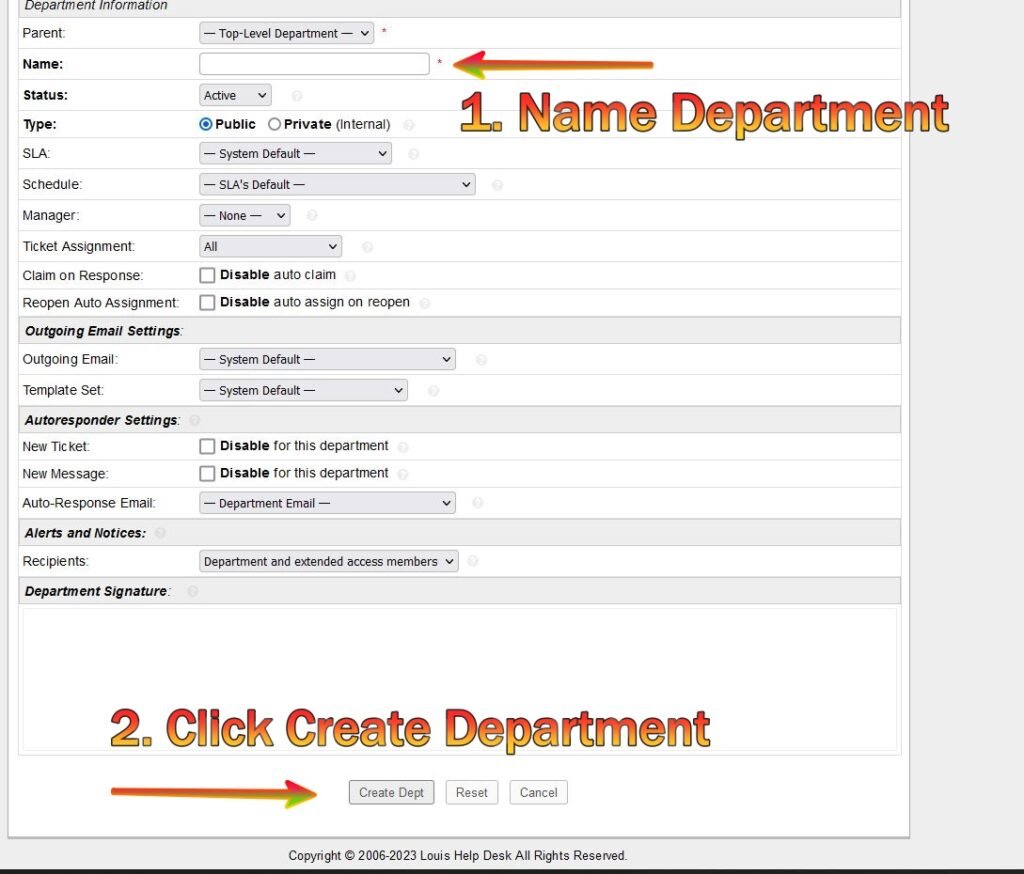
Step 2. Configure the Departments
Admin Panel -> Agents -> Departments
For testing purposes create the department: System Administrators
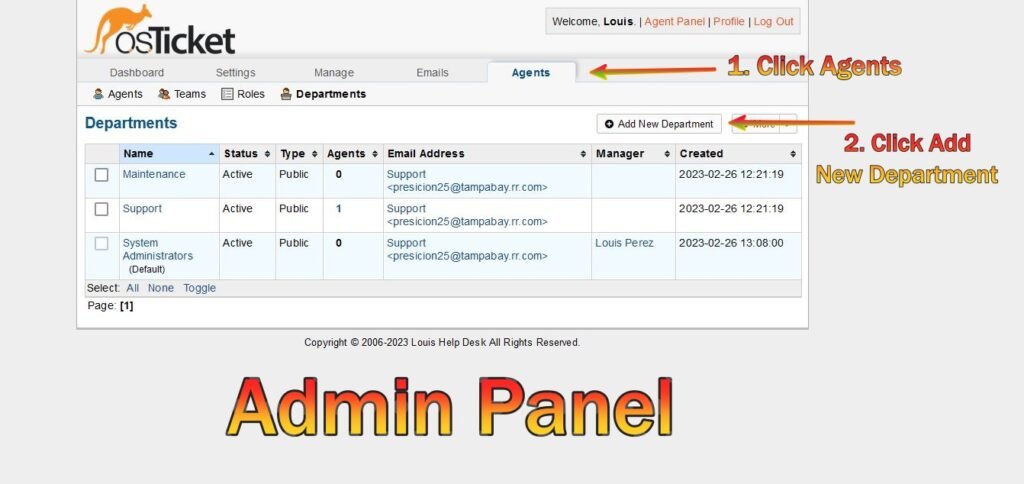
2b.
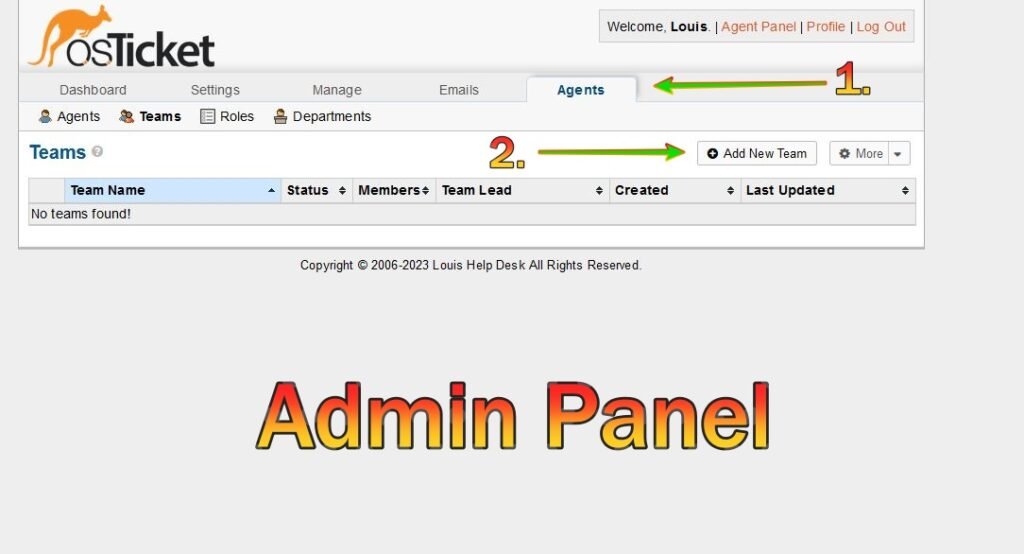
Step 3. Configure Teams
Admin Panel -> Agents -> Teams
For the purposes of testing create two teams (Level I Support, Level II Support)
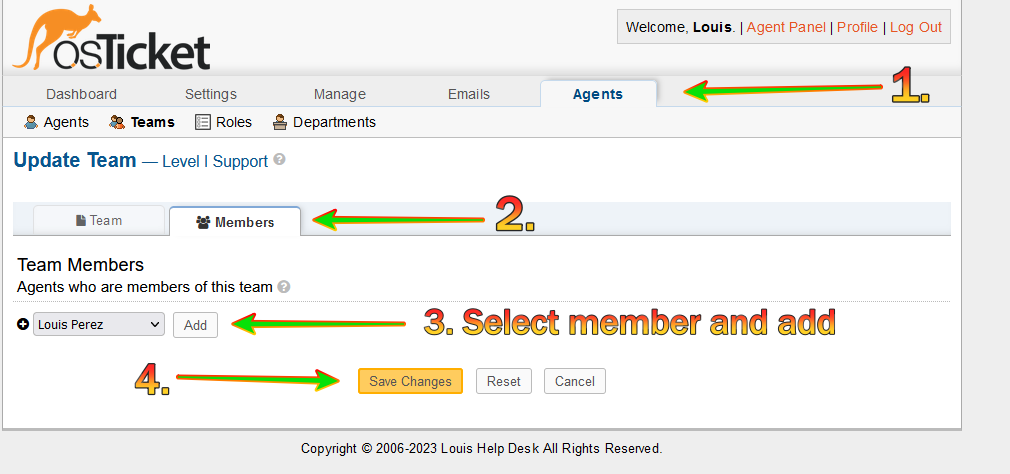
3b. Name the new team

3c. Add a member to the team
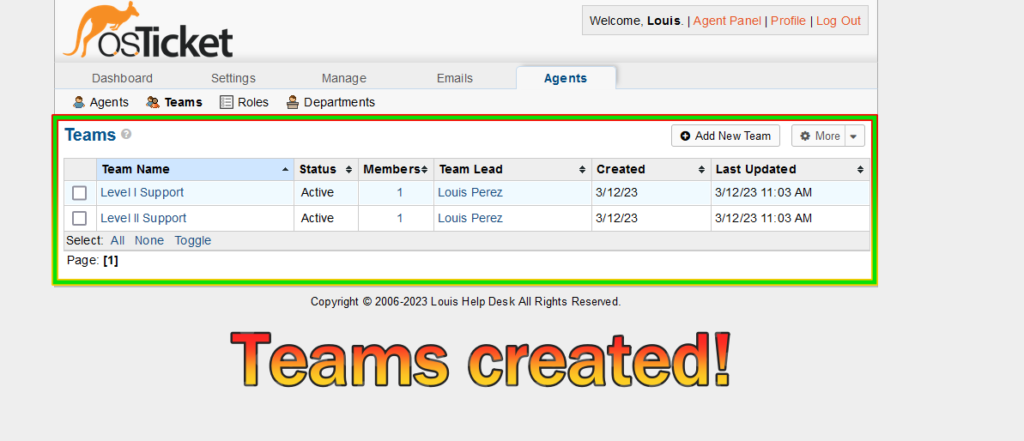
3d. Teams Have Been Created
Step 4. Allow anyone to create tickets. Go to:
Admin Panel -> Settings -> User Settings
Registration Required: Require registration and login to create tickets

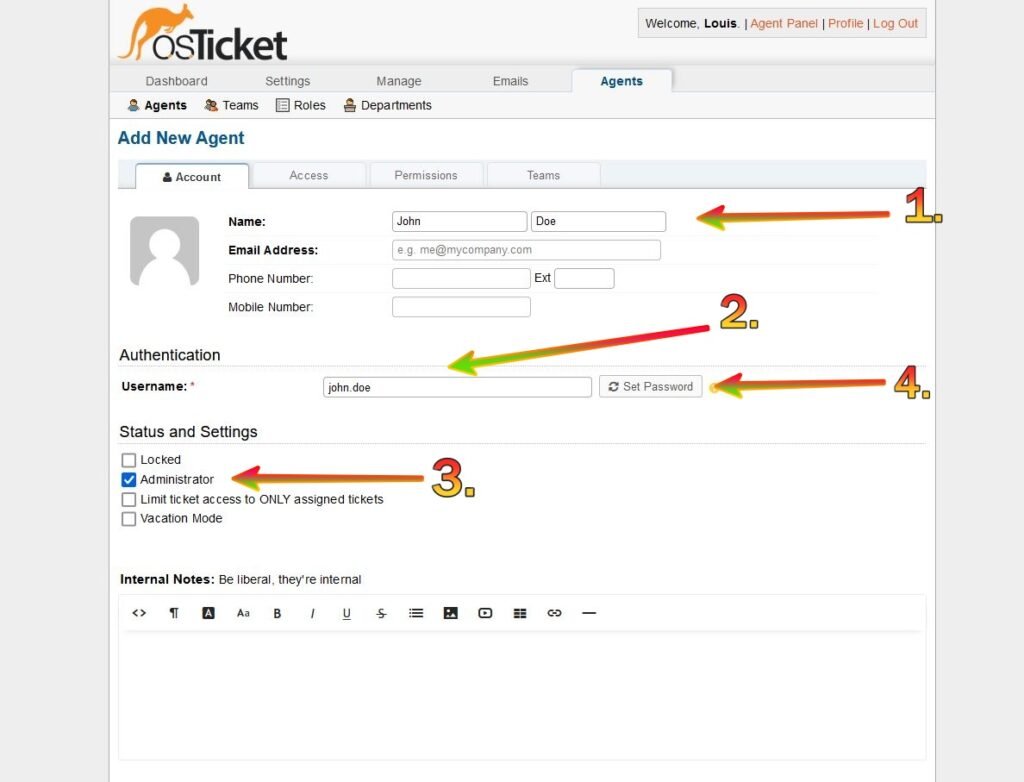
Step 5. Configure Agents (Workers who will work the tickets). Go to:
Admin Panel -> Agents -> Add New
(Whatever names you choose)
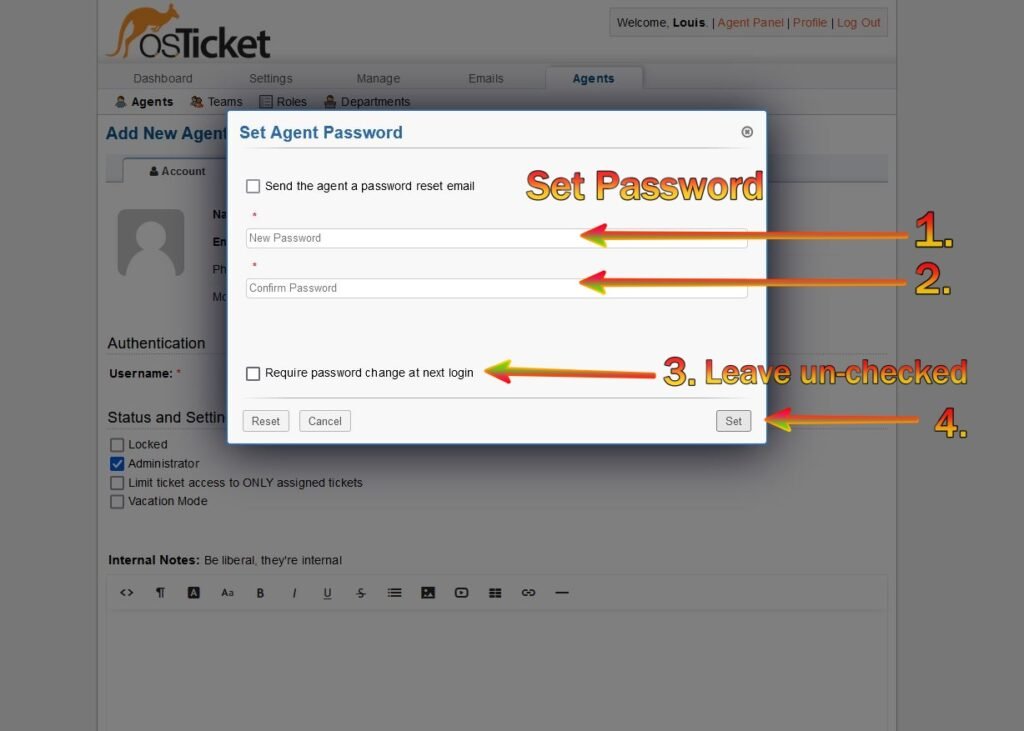
5b. Set the agent password
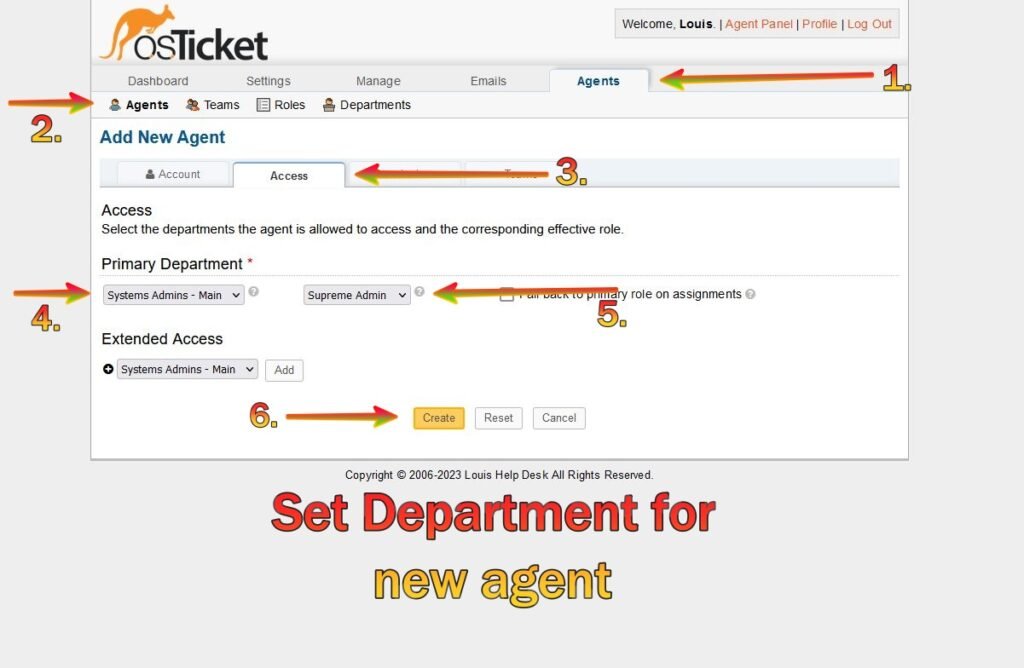
5c. Set the department for the agent
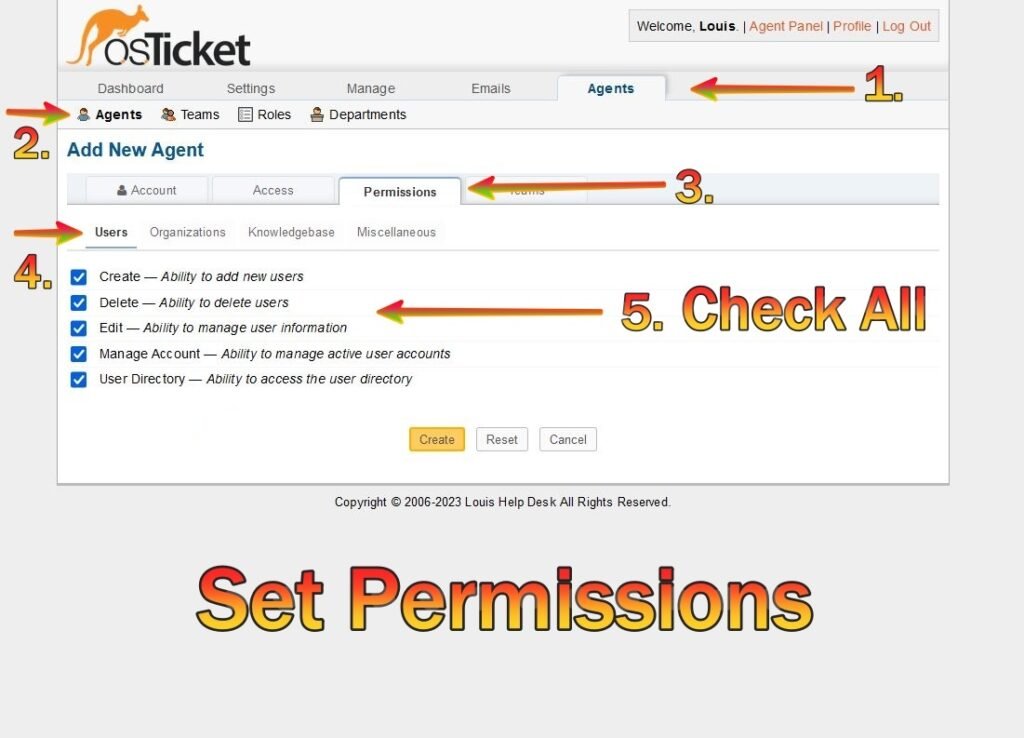
5d. Set the permissions for the new agent
5e. Set the team for the new agent

5f. New agent has been created

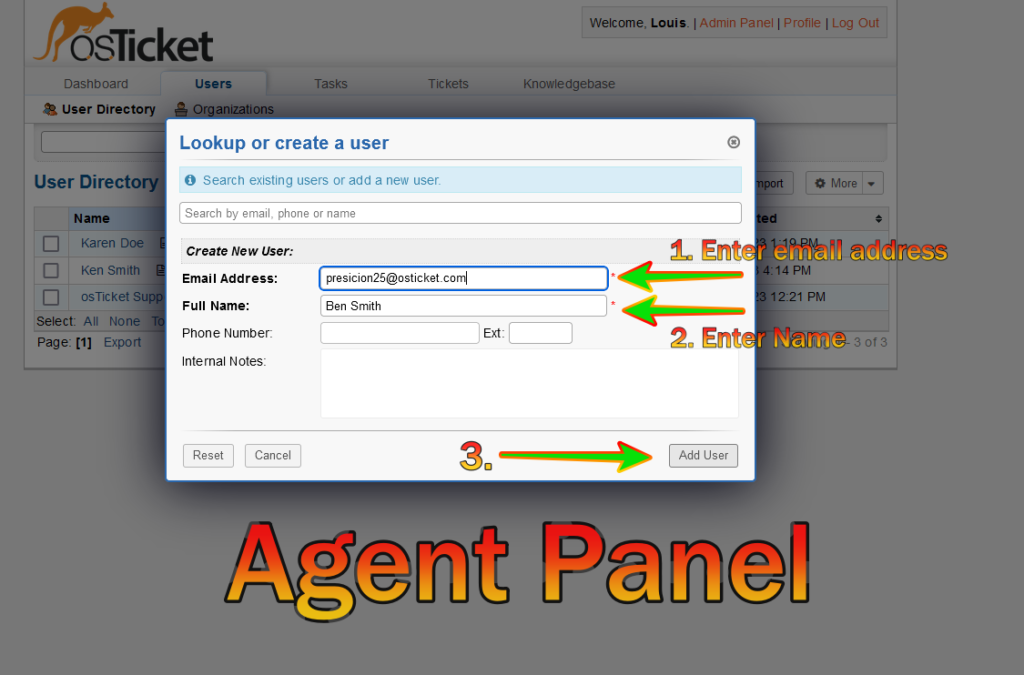
Step 6. Go the the agent panel and create new user (Customers who can create a service ticket request). Go to:
Agent Panel -> Users -> Add New
For the purposes of testing create two users (whatever names you choose)

6b. Enter the details of the new user
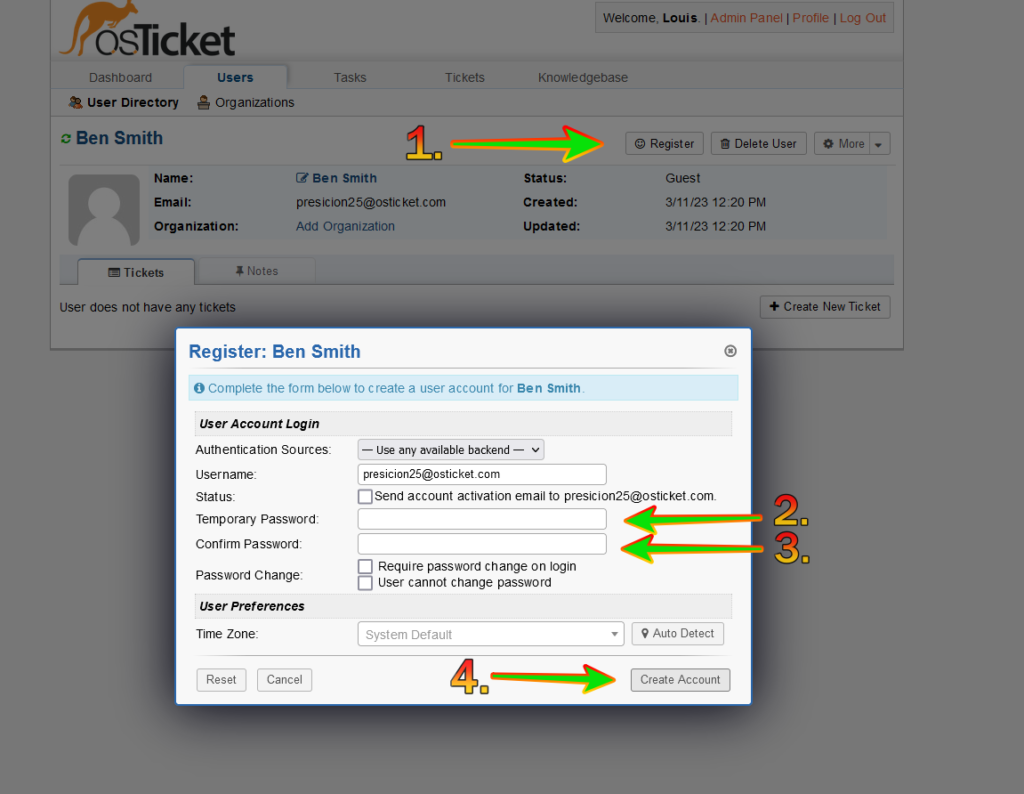
6c. New user has been created

6d. Register the new user
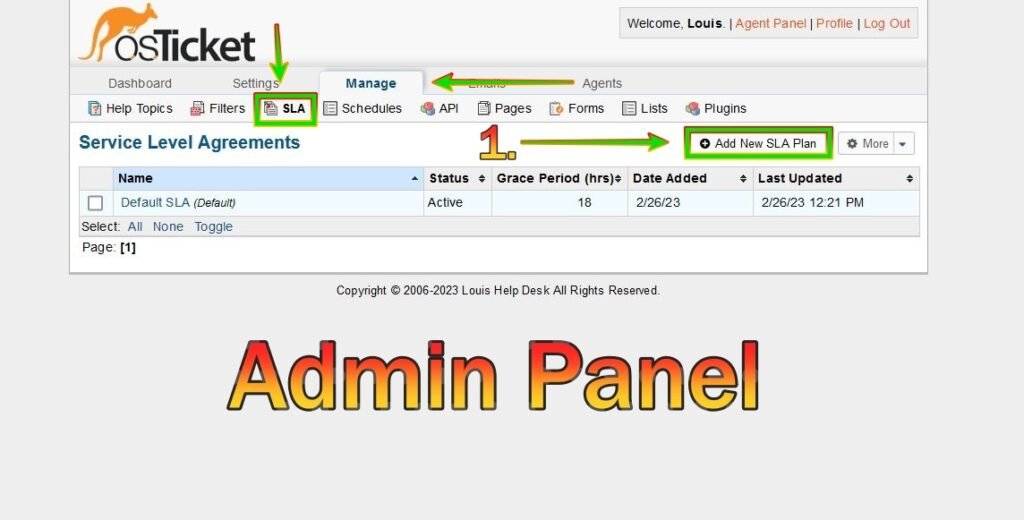
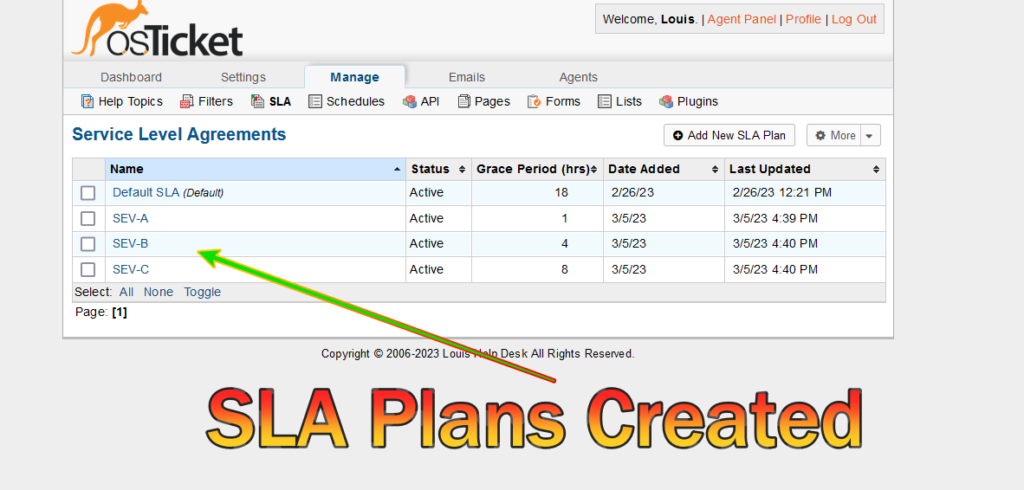
Step 7. Configure SLA (Service Level Agreements)
Admin Panel -> Manage -> SLA
For the purposes of testing configure three
Sev-A (1 hour, 24/7)
Sev-B (4 hours, 24/7)
Sev-C (8 hours, business hours)
7b. Give the plan a name and set the schedule
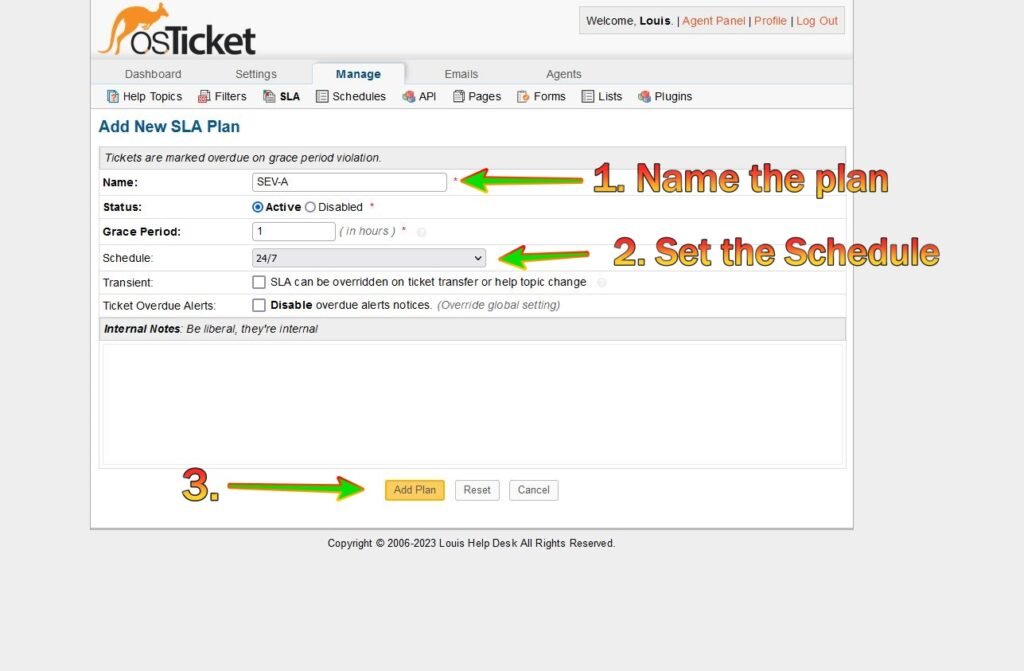
7c. SLA Plans Created
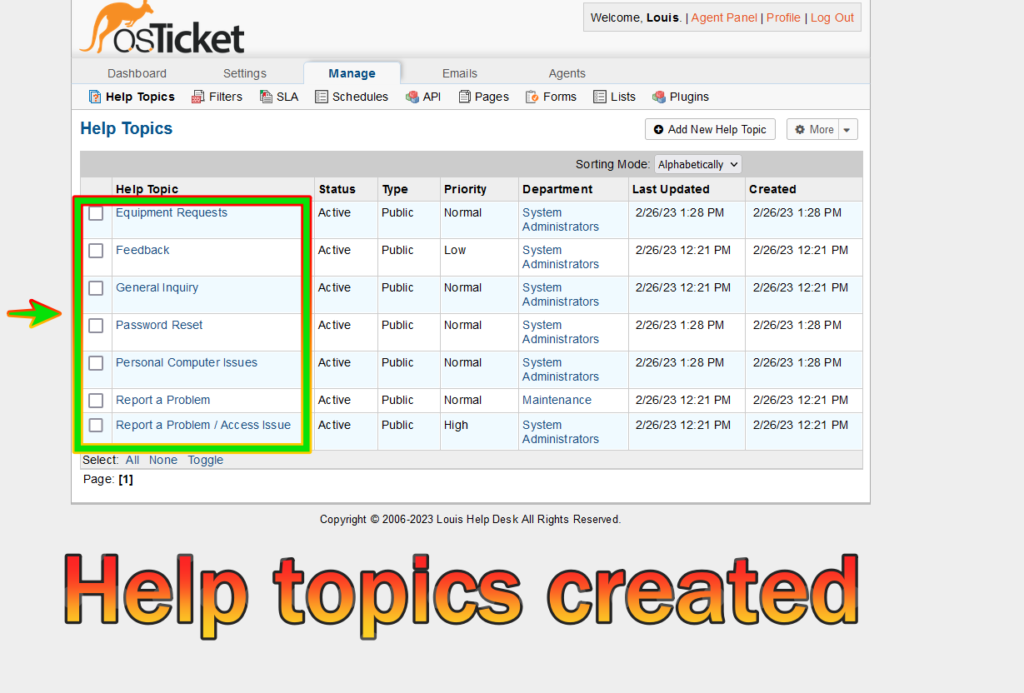
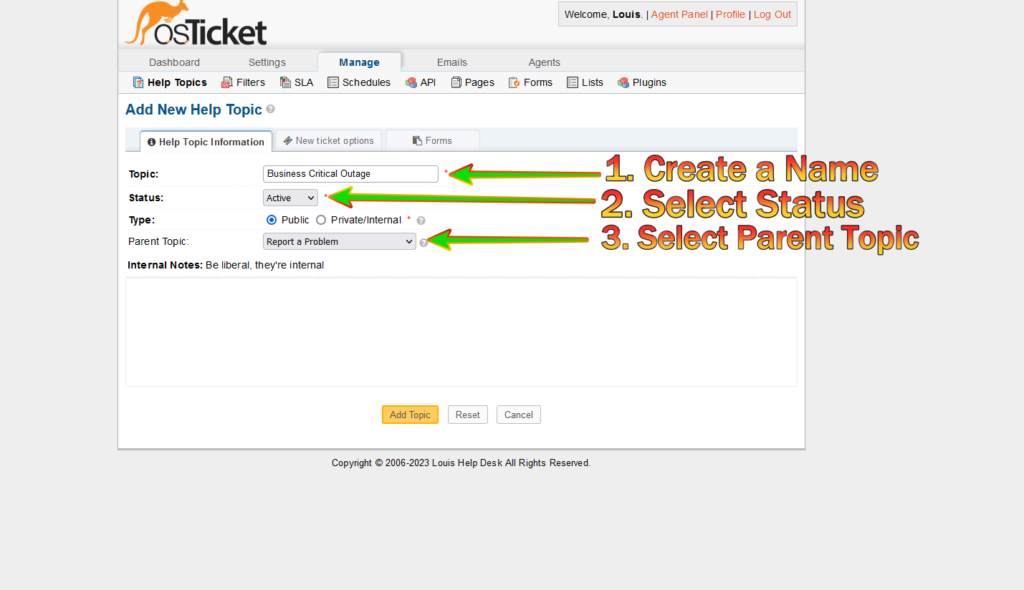
Step 8. Configure Help Topics
Admin Panel -> Manage -> Help Topics
For the purposes of testing create four topics
Business Critical Outage
Personal Computer Issues
Equipment Request
Password Reset

8b. Set the help topic details (Name, Status, Parent Topic)
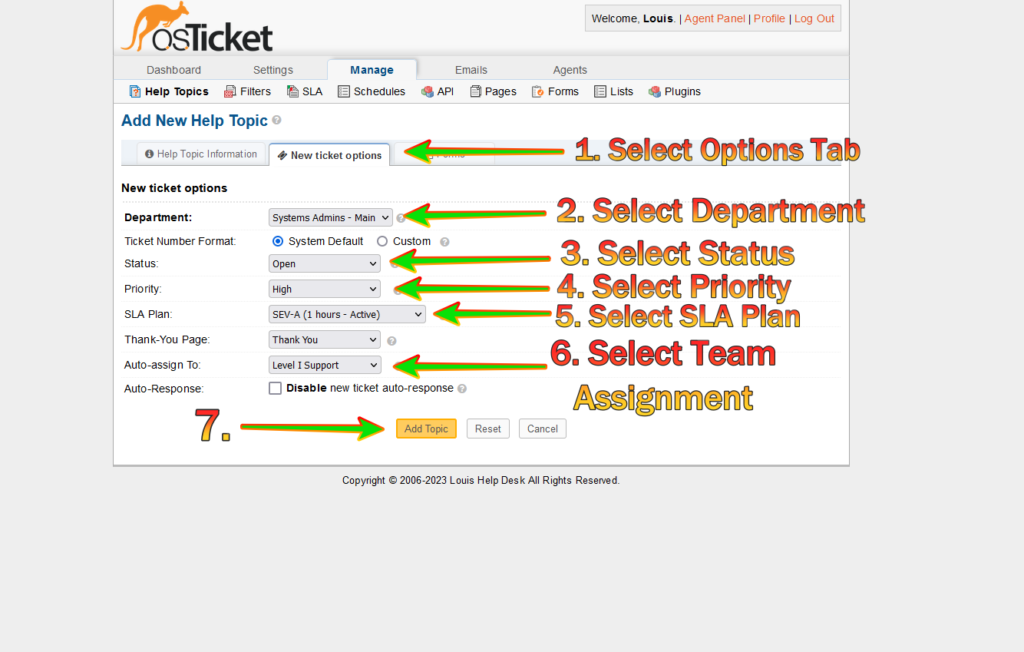
8c. Next, set the ticket options for the created help topic (department, status, priority, SLA plan, team assignment)
8d. Help Topics Have Been Created