Technologies and Environments Used
- Azure Virtual Machines
- PHP Manager
- MySQL
- osTicket (Help Desk Ticketing System)
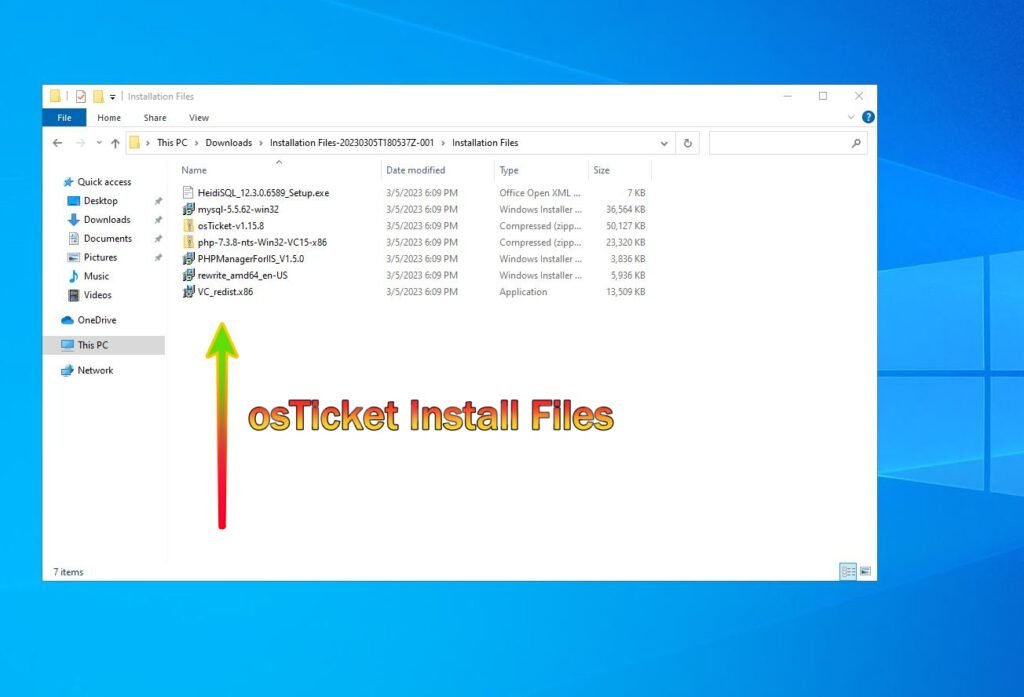
In this tutorial I will install osTicket on an Azure VM (Virtual Machine). This tutorial assumes you have already created a VM and are logged in to it. The install files for osTicket can be found here
Main Steps
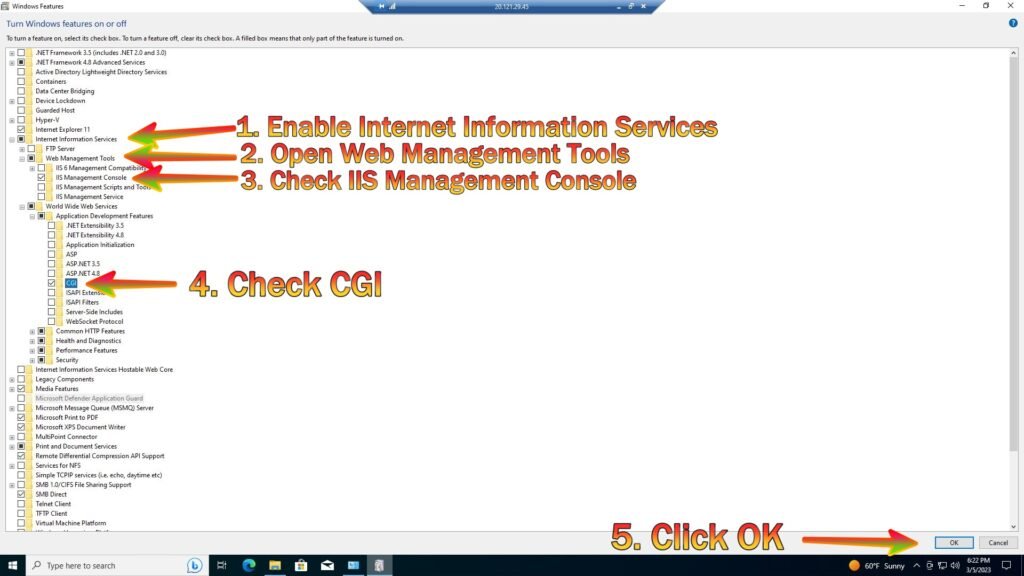
Step 1. Install / Enable IIS in Windows WITH CGI (World Wide Web Services -> Application Development Features -> [X] CGI)
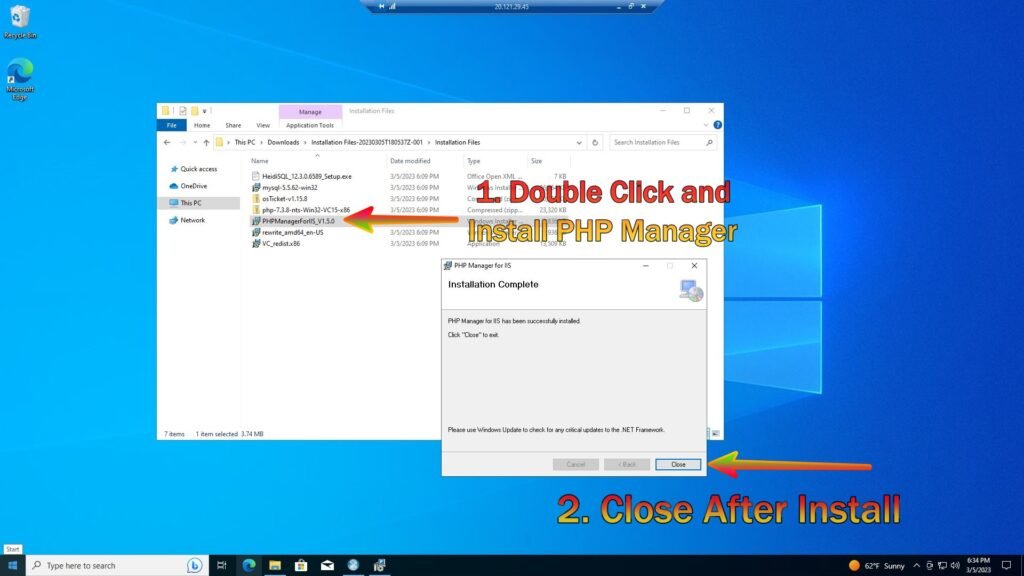
Step 2. From the installation files, install PHP Manager for IIS (PHPManagerForIIS_V1.5.0.msi)
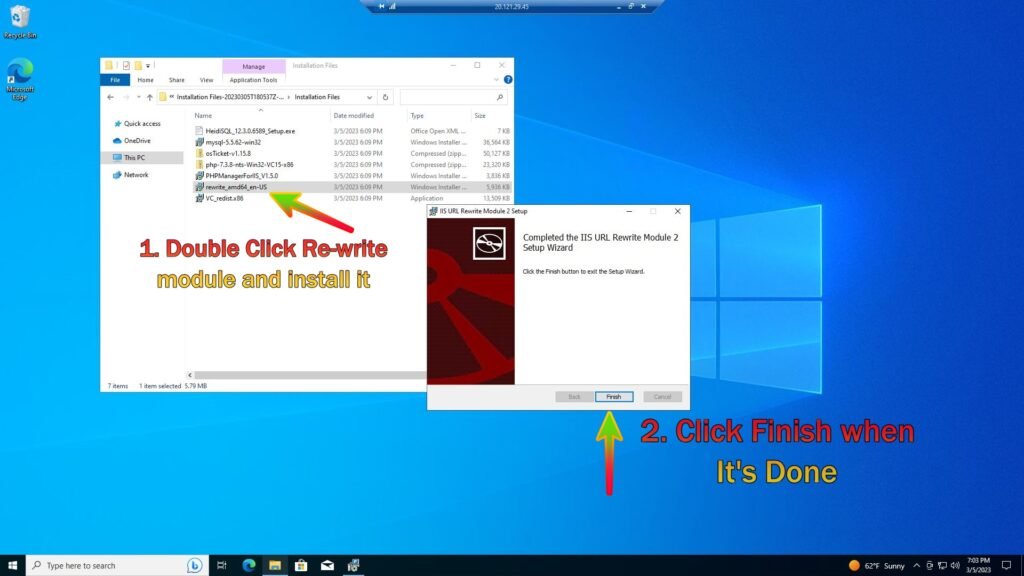
Step 3. From the installation files, install the Rewrite Module (rewrite_amd64_en-US.msi)
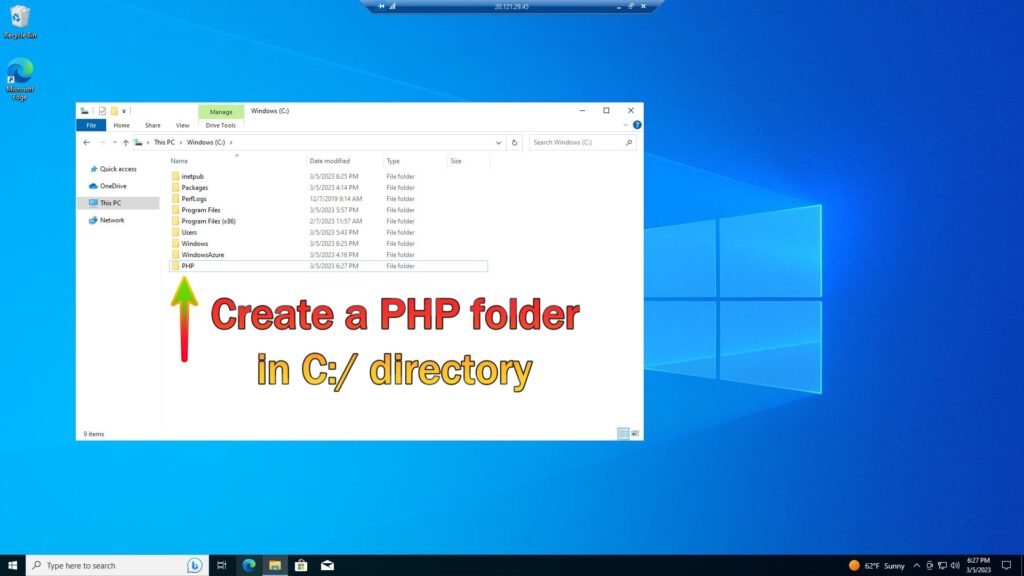
Step 4. Create the directory C:\PHP
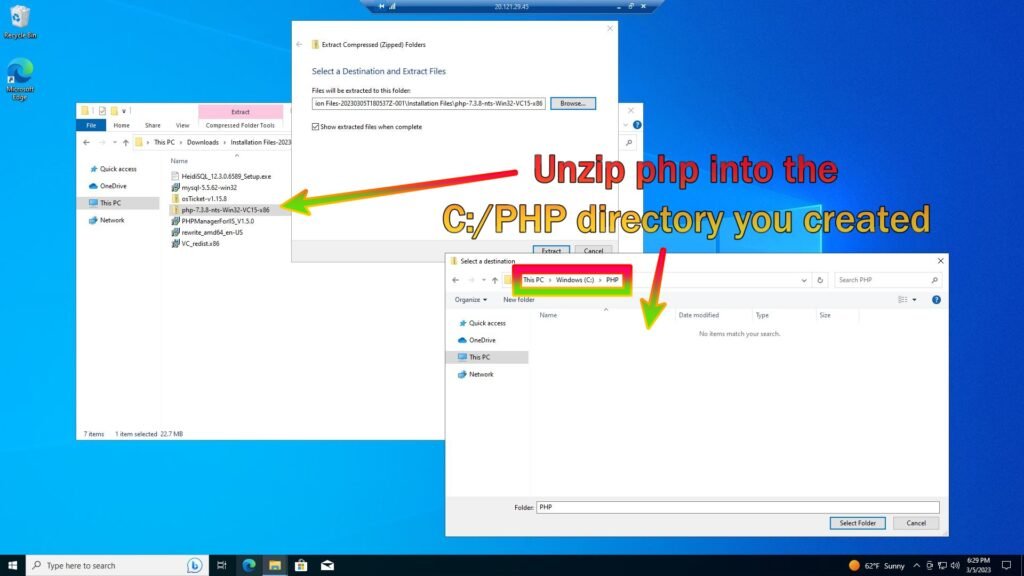
Step 5. From the installation files unzip PHP 7.3.8 (php-7.3.8-nts-Win32-VC15-x86.zip) into C:\PHP
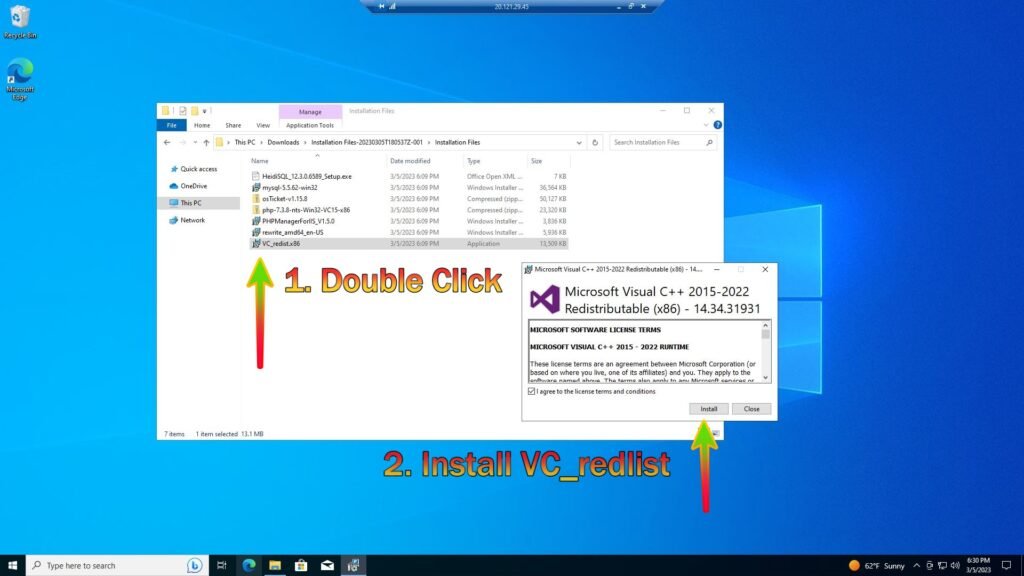
Step 6. From the installation files install VC_redist.x86.exe.
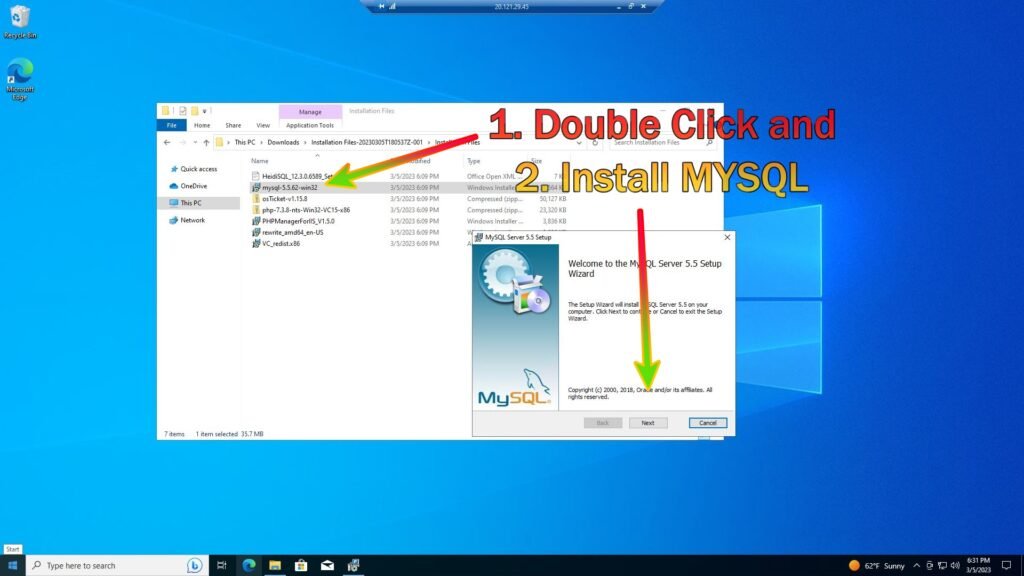
Step 7. From the installation files install MySQL 5.5.62 (mysql-5.5.62-win32.msi)
Typical Setup ->
Launch Configuration Wizard (after install) ->
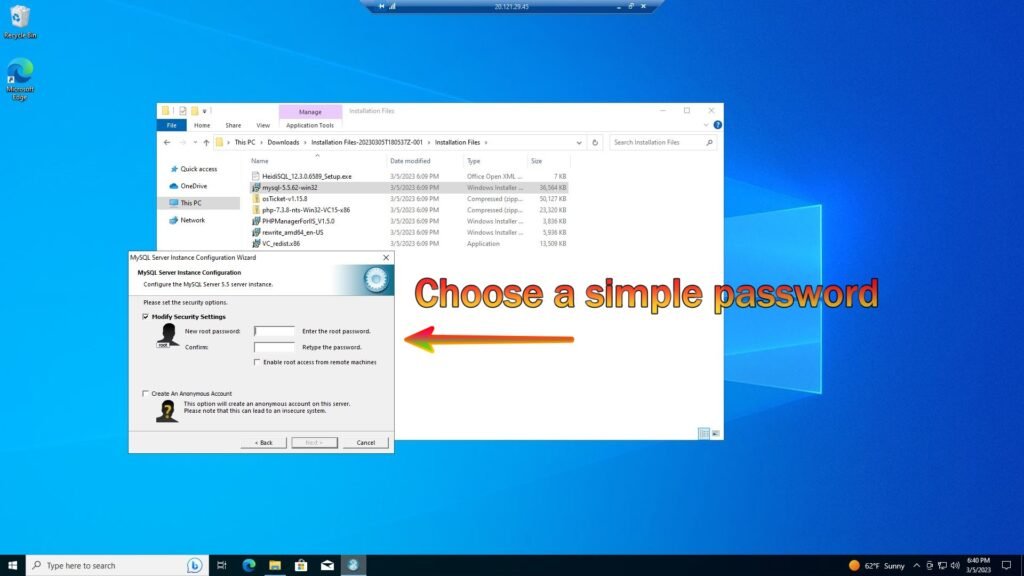
Standard Configuration ->
Password1
7b.

7c.
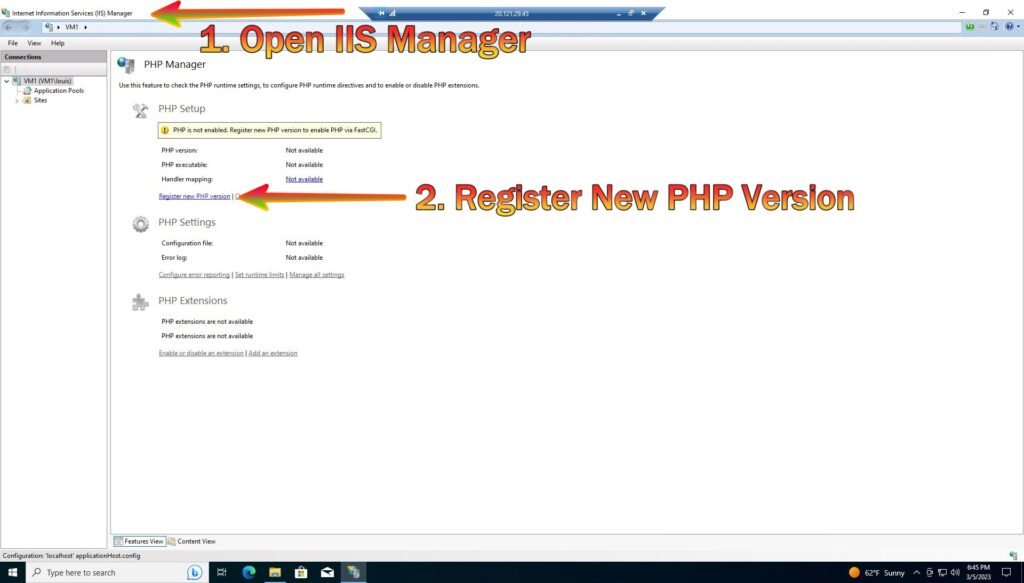
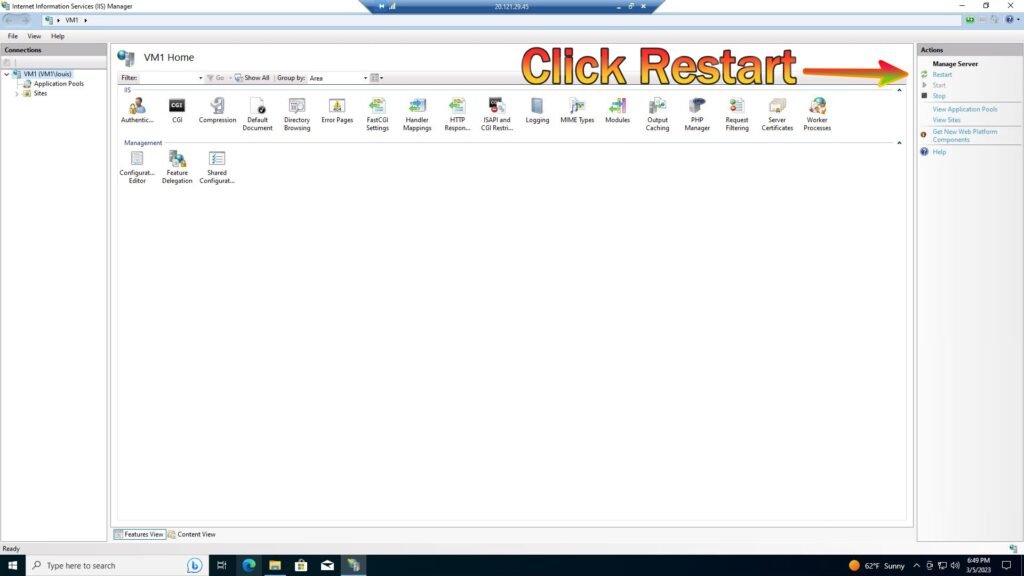
Step 8. Open IIS as an Admin, register PHP, then restart the server

8b.
8c.
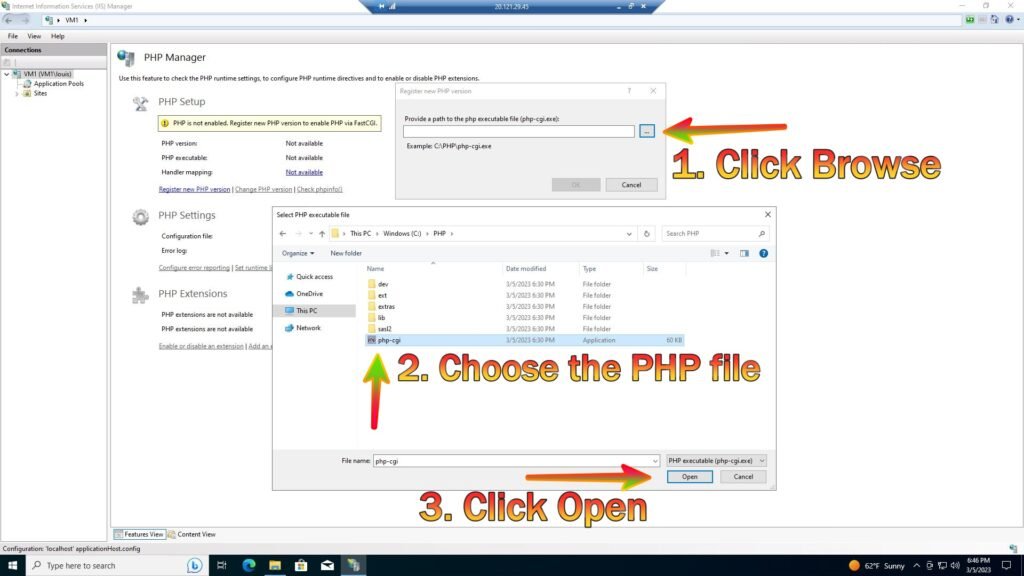
8d.
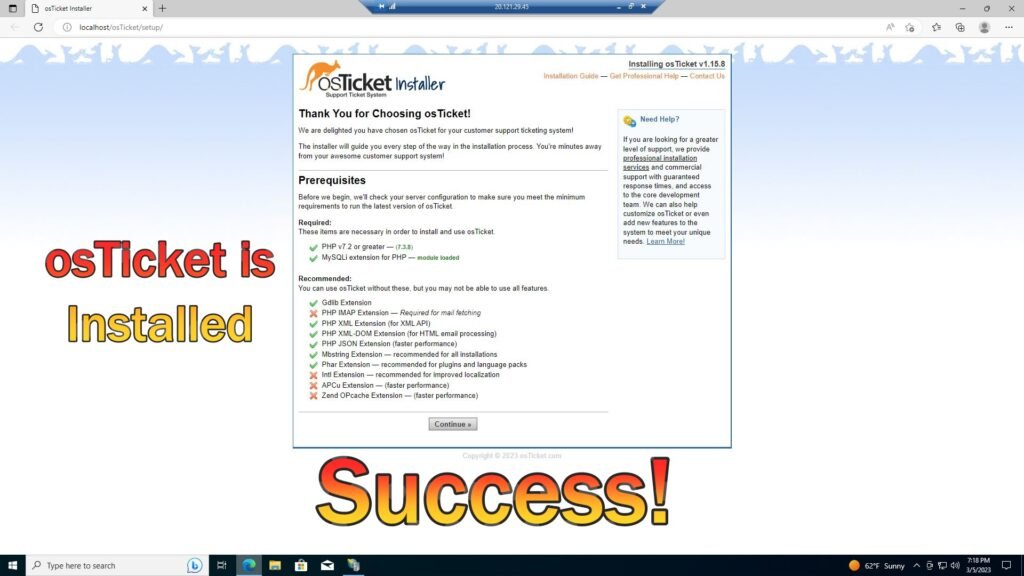
Step 9. Install osTicket v1.15.8
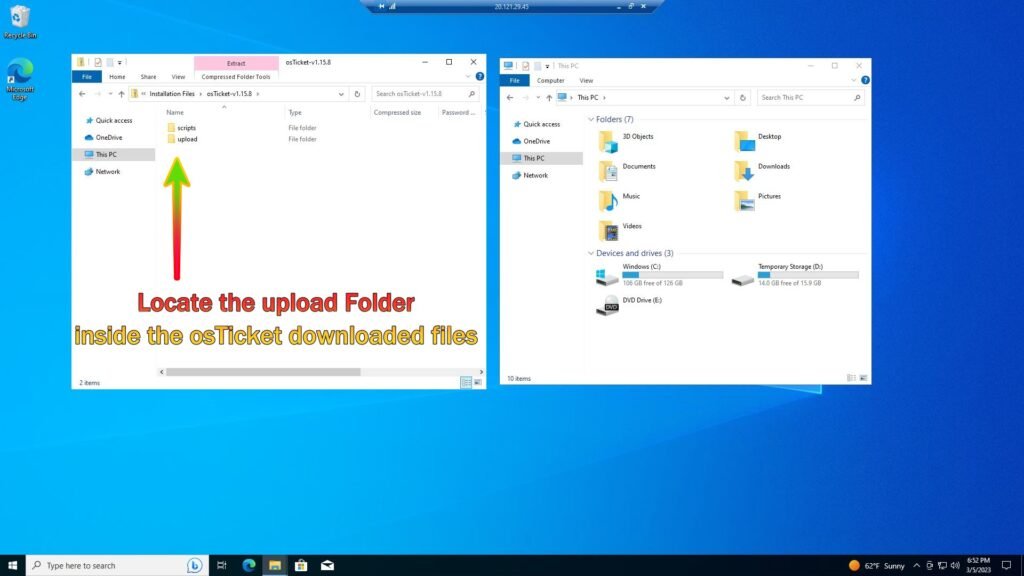
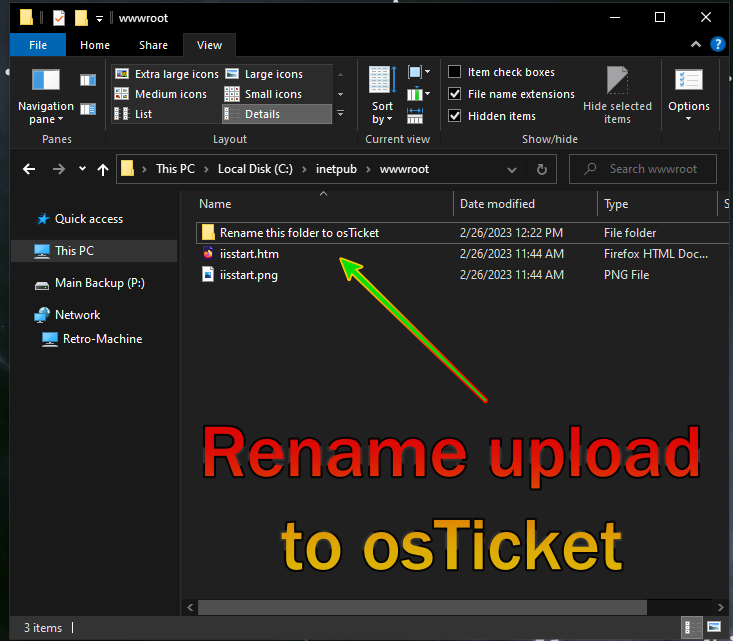
9b. Copy “upload” folder to c:\inetpub\wwwroot
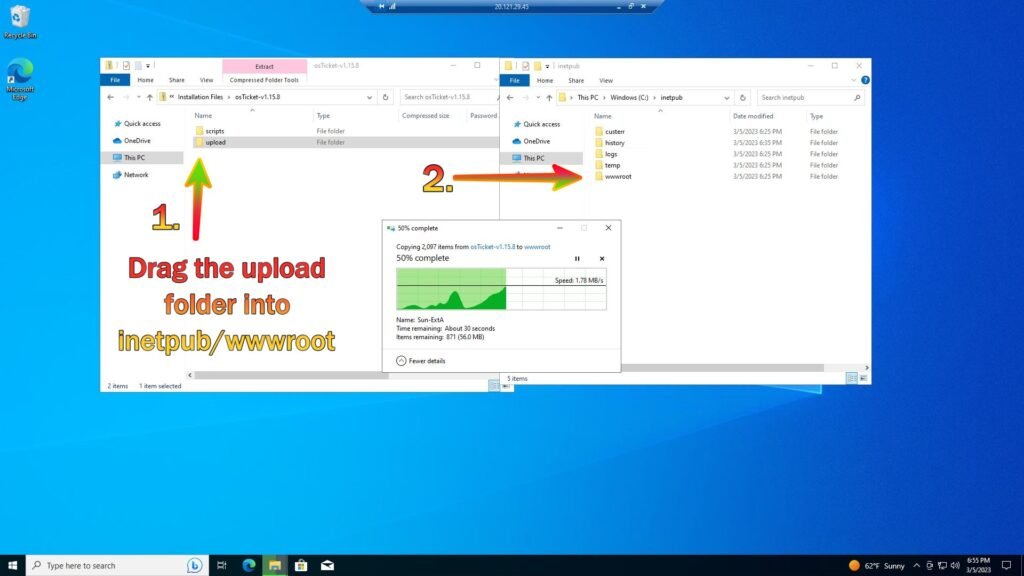
9c. Within C:\inetpub\wwwroot, rename “upload” to “osTicket”
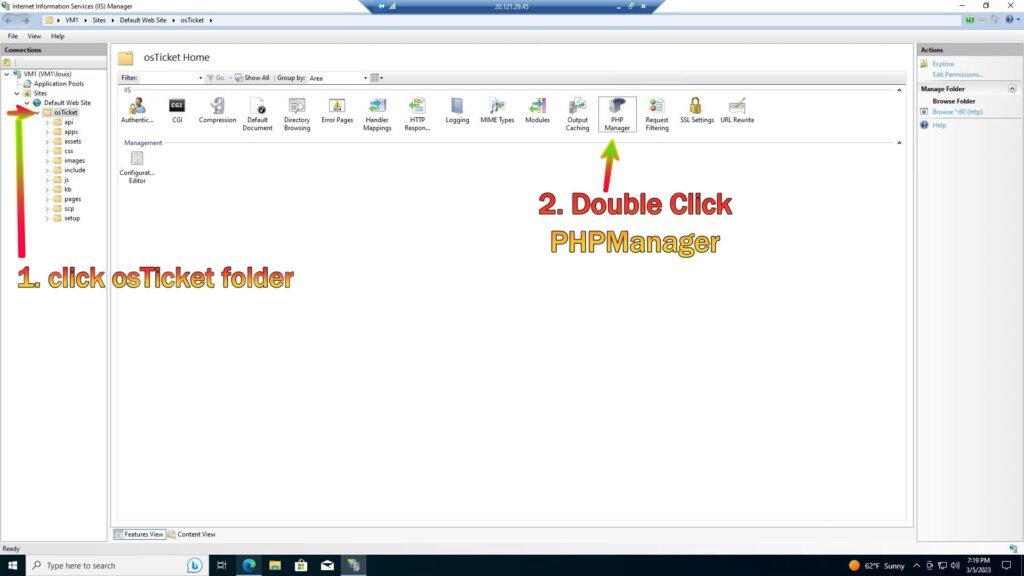
Step 10. Note that some extensions are not enabled
Go back to IIS, sites -> Default -> osTicket and double click PHP manager
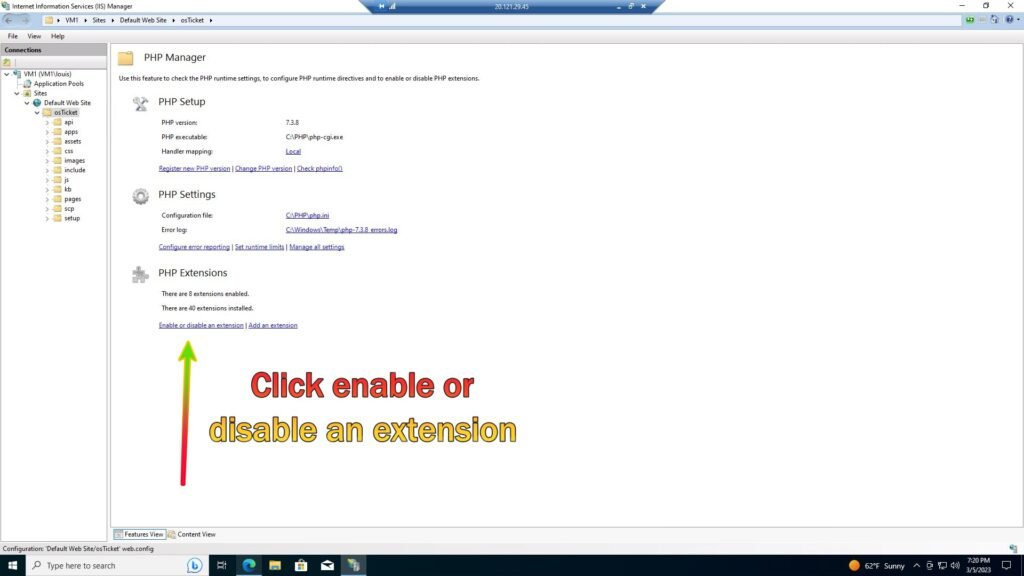
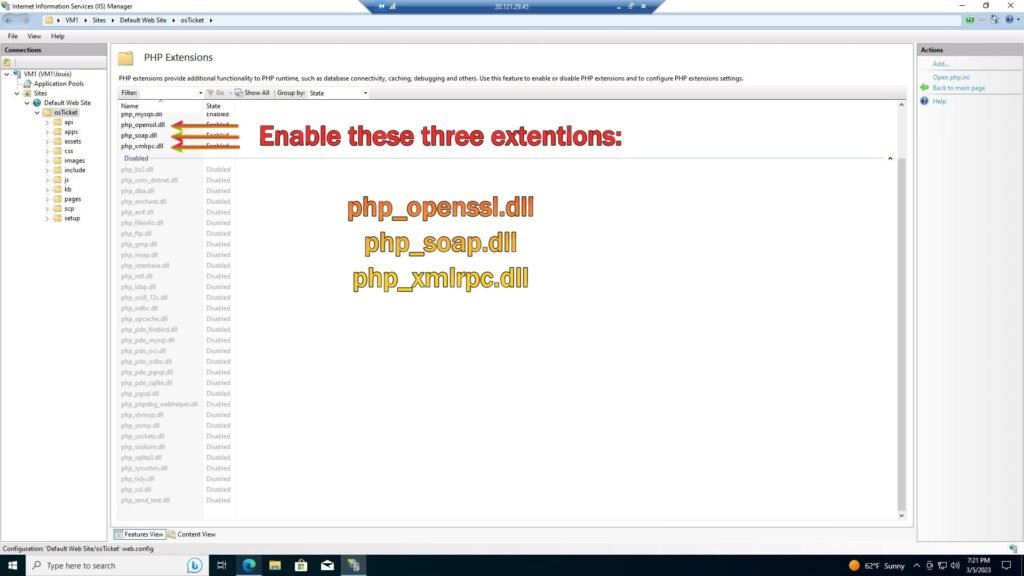
10b. Click “Enable or disable an extension” and enable these extensions: php_imap.dll, php_intl.dll, php_opcache.dll
10c. Install the three .dll extensions as shown below
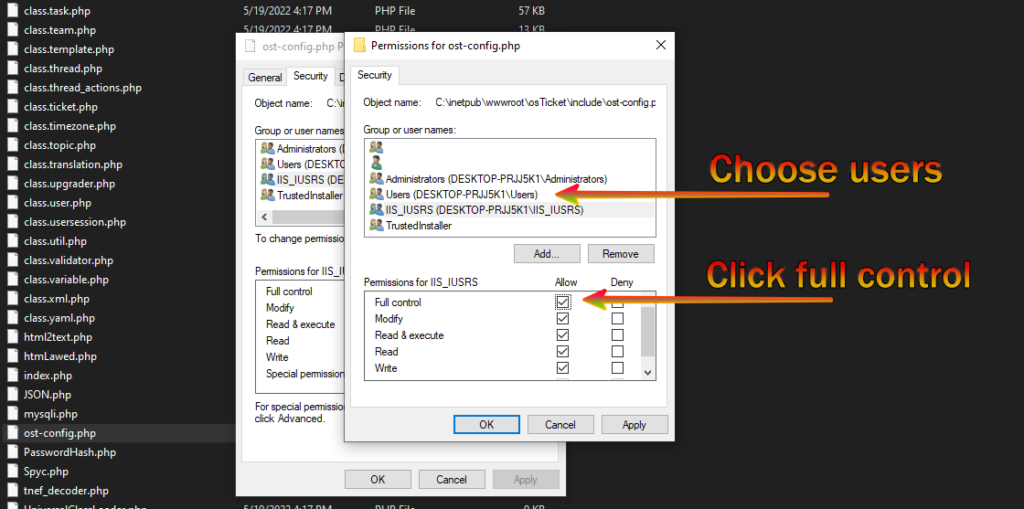
Step 11. After navigating to http://localhost/osTicket/setup/install, rename the ost-config.php file (see below) and click continue.
From: C:\inetpub\wwwroot\osTicket\include\ost-sampleconfig.php
To: C:\inetpub\wwwroot\osTicket\include\ost-config.php
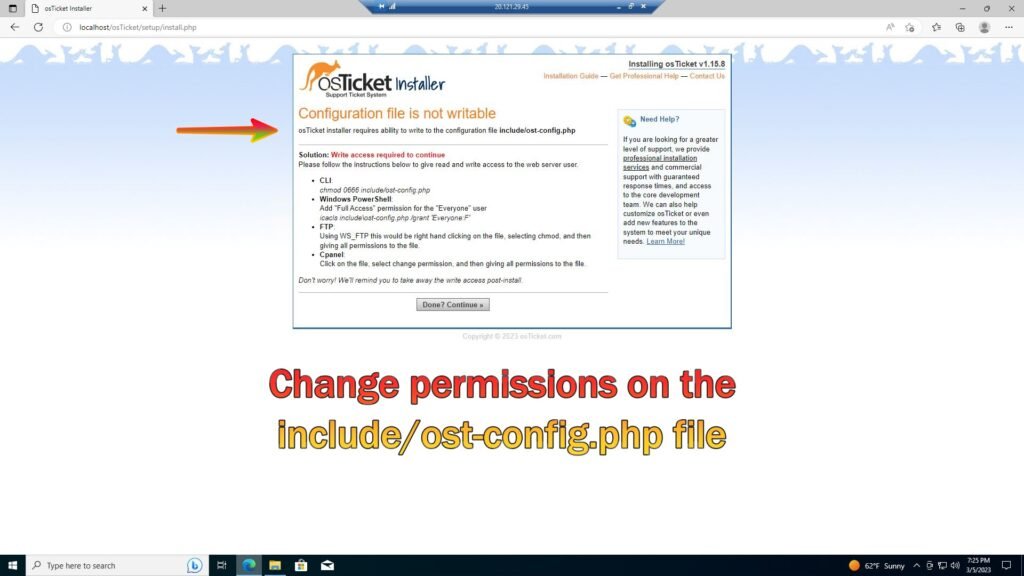
11b.
Step 12. After changing the ost-config.php file and clicking continue and you should see the following screen:
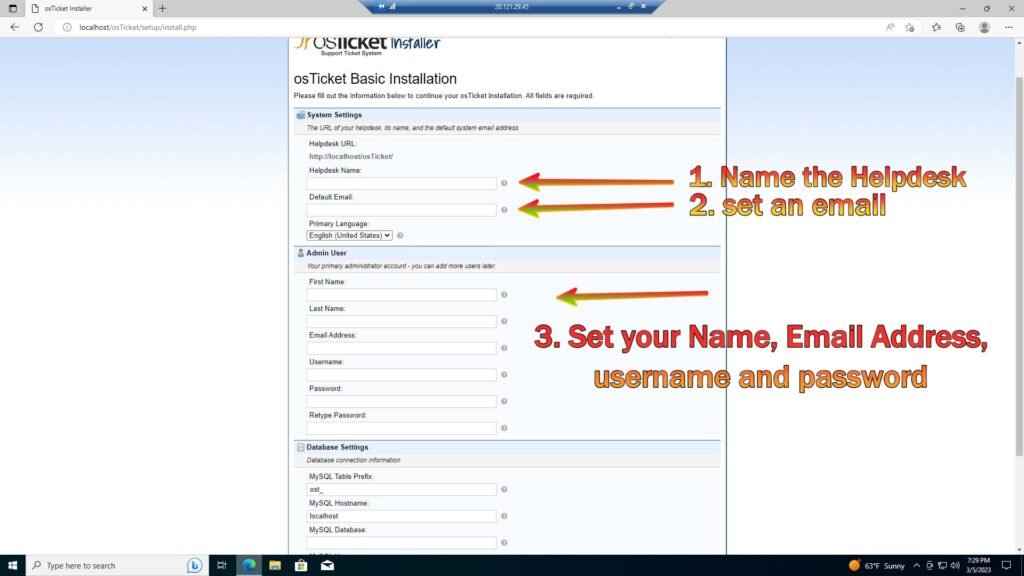
Once the above information is filled in click save changes at the bottom of the screen.
12b. After saving you should see this screen. Click continue at the bottom of the screen.
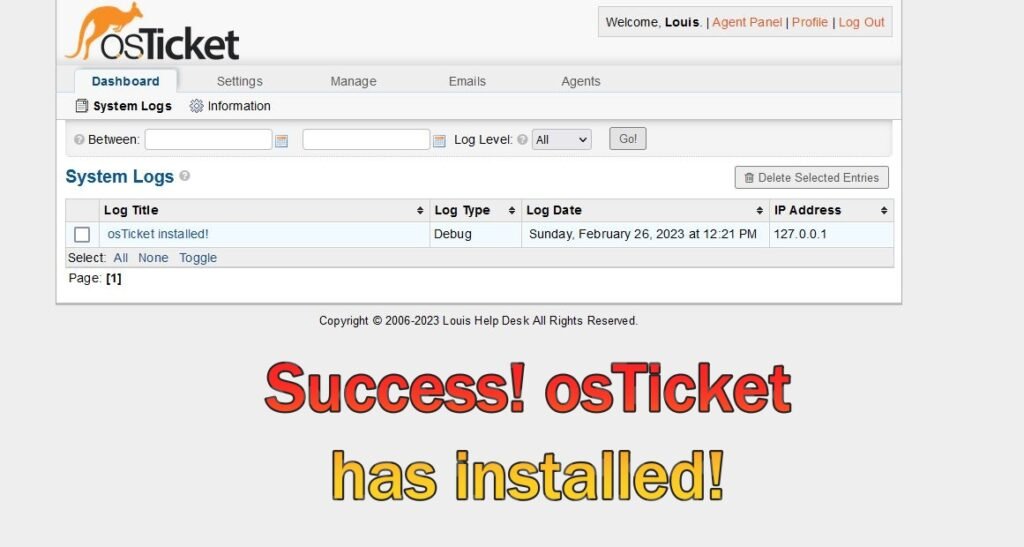
Step 13. Back in osTicket Click the Dashboard tab and you should see the following screen:
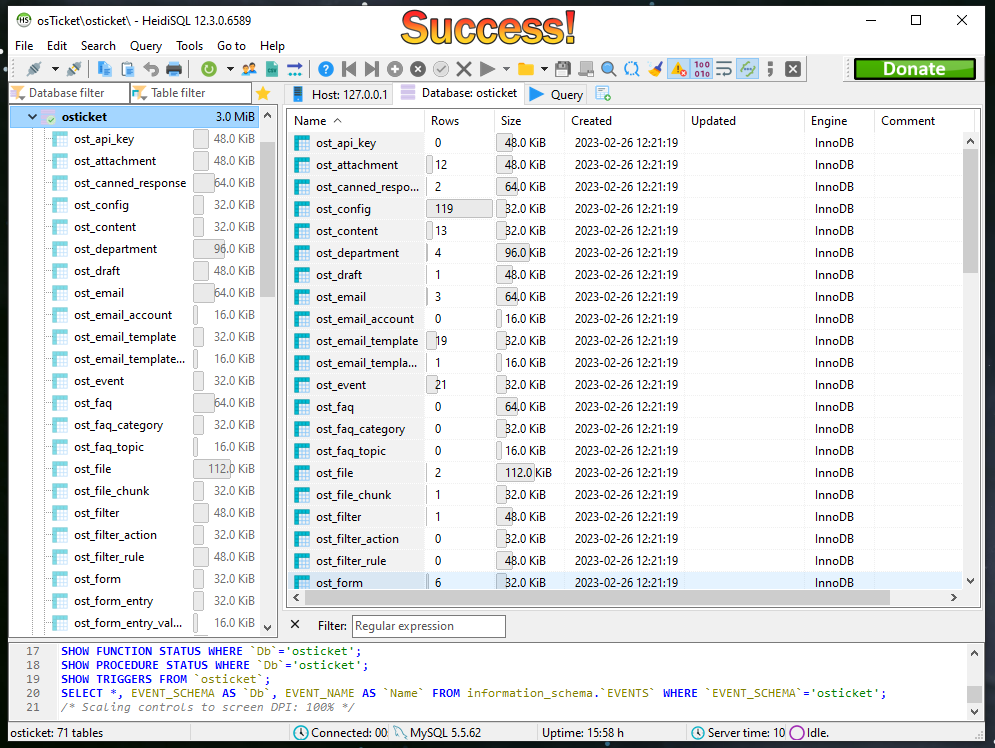
Step 14. From the installation files install HeidiSQL
Open Heidi SQL
Create a new session, root/Password1
Connect to the session
Create a database called “osTicket”
Click Open
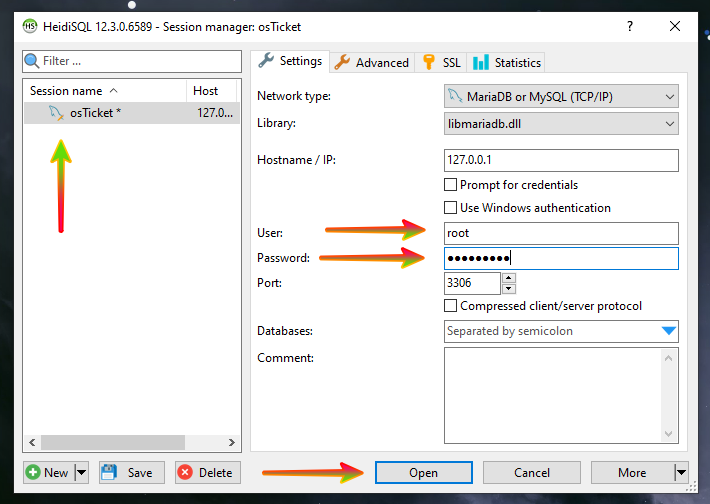
14b. After you click open you should see the following screen: (which means you are connected to the database)