- Home
- Blog security – A Beginner’s Guide
- Projects & Progress
- IT Tutorials
- osTicket
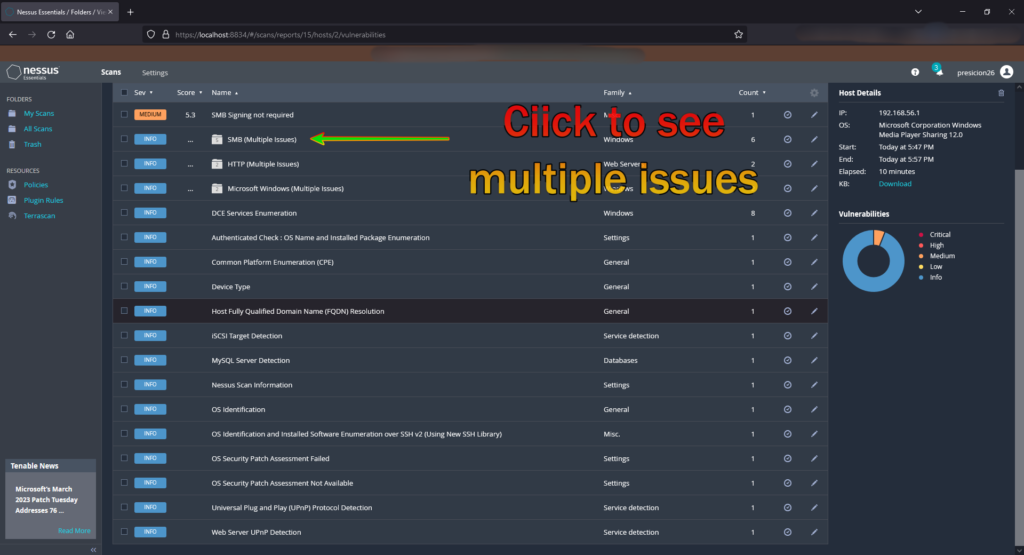
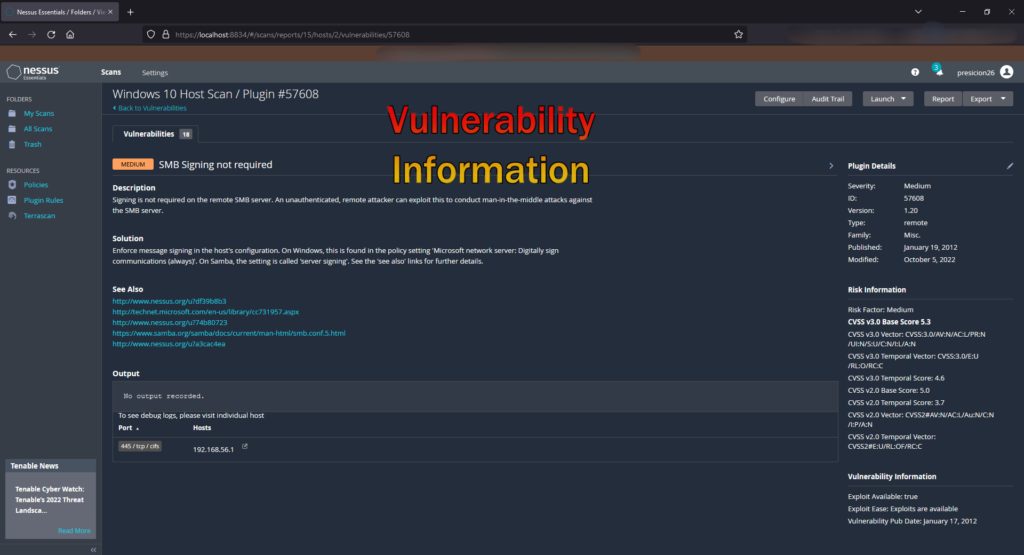
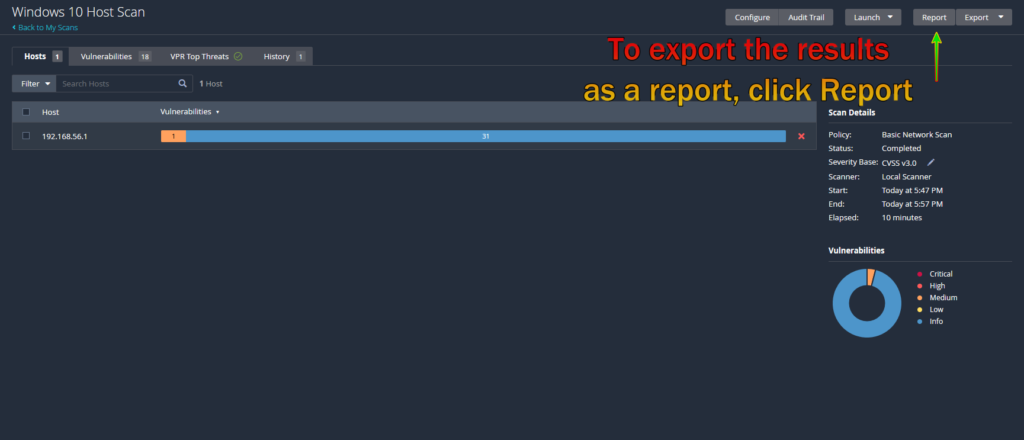
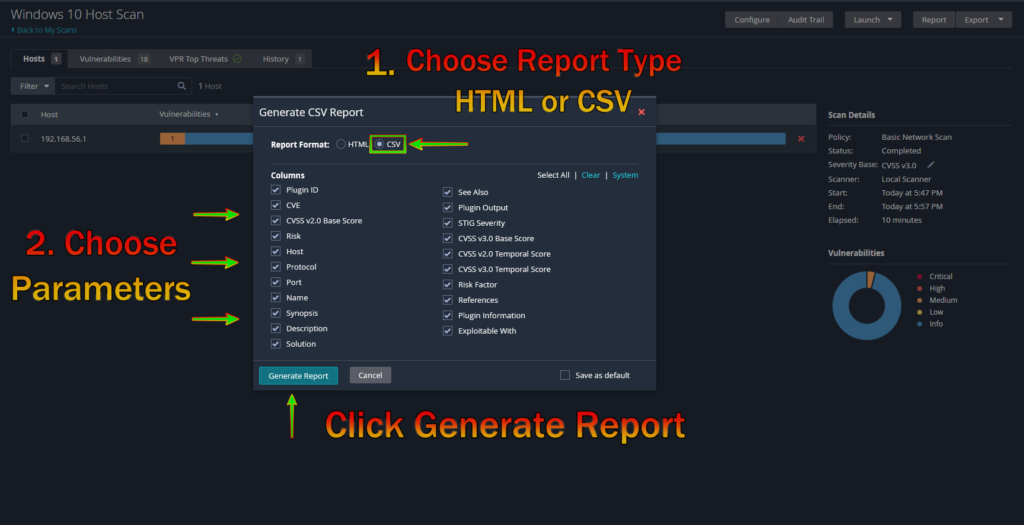
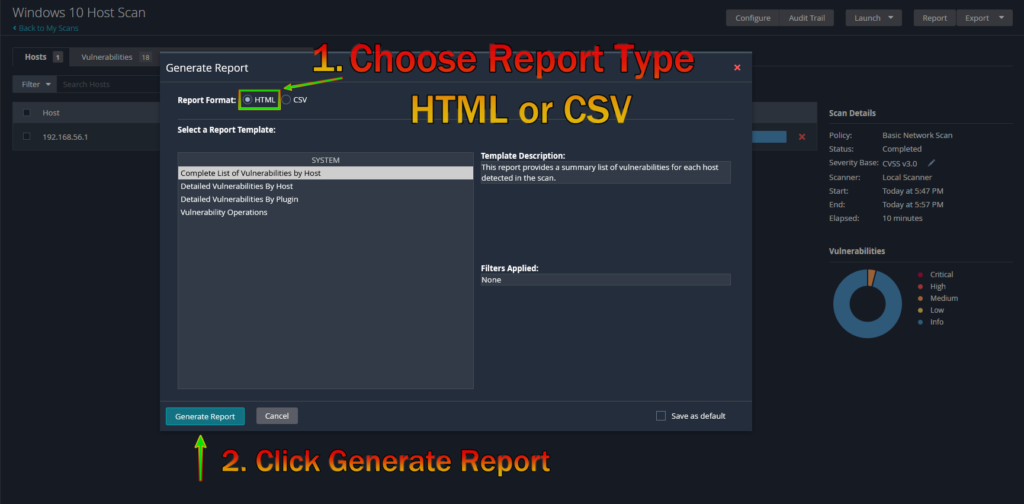
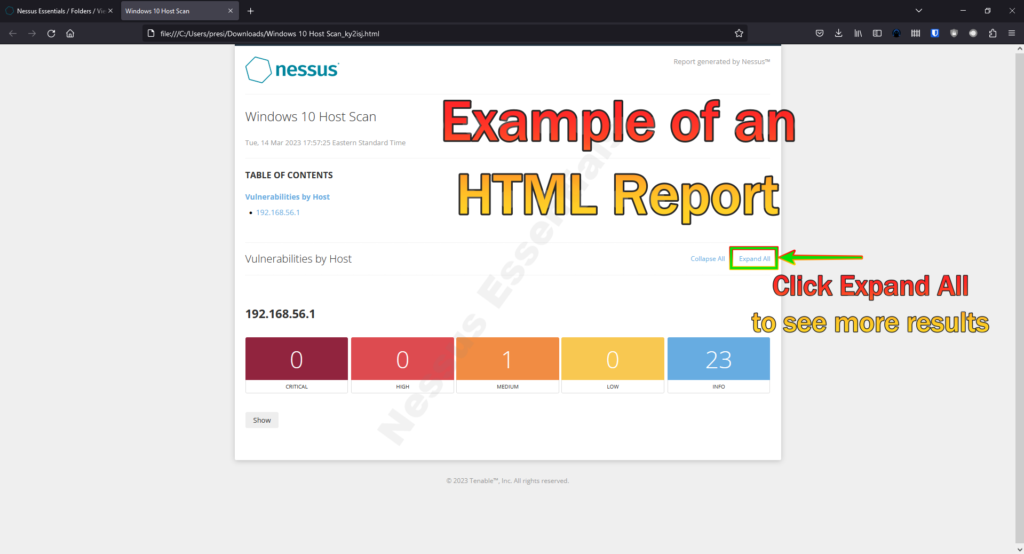
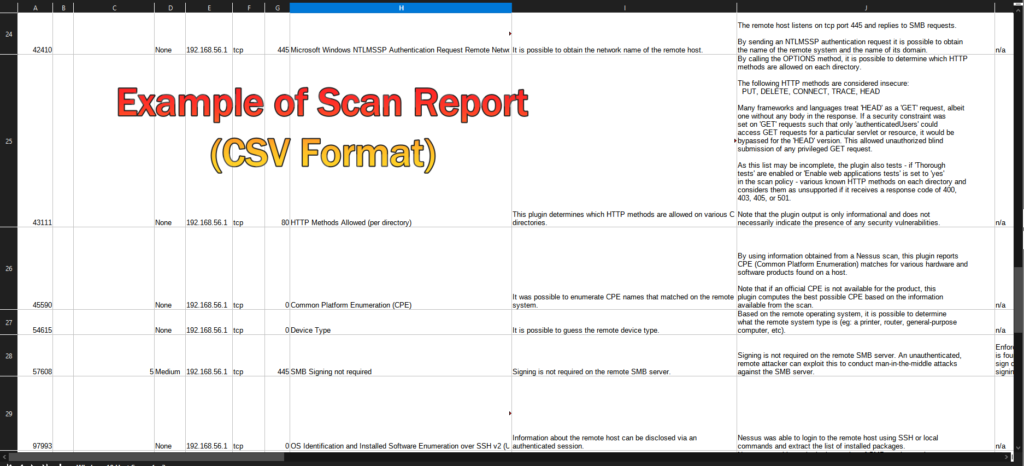
- Tenable Nessus (Vulnerability Scanner)
- Microsoft Azure
- Microsoft Azure SOC and HoneyNet
- Microsoft Azure Active Directory (User & Group Creation/Access Management Configuration)
- Microsoft Azure – Active Directory Overview and Failed Authentication/Log Observation
- Microsoft Azure KQL (Kusto Query Language) Demonstration
- Microsoft Azure Virtual Machines Traffic Inspection
- Microsoft Azure Active Directory Deployed in the Cloud
- Synology NAS
- Kubernetes (Intro Tutorial)
- Docker (Intro Tutorial)
- Nmap (Tutorial)
- Wireshark (Intro Tutorial)
- Splunk (Creating a Basic Chart)
- Hunxploit04 Demo (OSINT Instagram Tool)
- Blog
- AI Tools
- About Me

